How to Launch a WordPress Site (A new website)
Do you need to learn how to launch a WordPress site? If you have a brand new business and it’s your first website you might build your website live under your domain name.
In other scenarios, you might have a coming soon page or an existing website. You have built a new website in the background and now it’s ready, the launch a WordPress site.
Typically at my web design agency, we build a clients new website under a sub-domain that’s hidden from Google (the site is set to no-index). It allows us to present the website live to our customers and we don’t need to mess around with setting up a local WordPress installation on a pc.
In this tutorial, you will learn my method of taking a website living on a sub-domain and pushing it live on your main domain name.
I have a previous article on moving a website from a sub-domain, although the process is similar, it requires a few more steps when launching a brand new website.
The Scenario:
We are ready to launch a WordPress site for a new client of ours, Coastal Cladding. They have their domain name registered, we will be moving the website from our development Cpanel hosting account to the clients final Cpanel account.
In Summary:
- The website will be launched from a sub-domain to the client’s primary domain.
- The website we are launching is built on WordPress, running Total Theme and WP Bakery.
- The hosting migration is cPanel to cPanel.
- This client does not have an existing website.
- The Domain name is currently no pointing anywhere
- We will be redirecting links from the old domain name to the new domain.
This launch will be mostly manual, yes there are plugins that can make it easier to Launch a WordPress Site, but it’s incredibly useful knowledge of how to do it manually.
Step 1 – Getting Hosting & Domain Name ready:
Hosting and domain setup is pretty straightforward, below is what you need to have prepared:
- A login to manage the domain name – We need this to either update the Name Servers or DNS records.
- Logins for both the old and target cPanel account so we can download and upload the WordPress website files and database.
Note: If your domain name is already pointing to the new hosting service you can skip step 2 as your Name Servers will already be set.
Step 2 – Setting Name Servers:
Every domain name provider has a different interface for adjusting Name Servers or DNS. These records tell the domain name where to point. Most small businesses will only use their domain name for their website, some businesses may use a domain name for Email, CRM, Accounting Software or other online services.
I am going to be setting the name servers early on as the client doesn’t have a current website, if you were replacing a live website you would do this last.
It’s important that you clarify what services the client has connected to their domain name as changing Name Servers or DNS can impact their current services.
Once you are ready to update the records, the first step is to take a screenshot or backup of the current records in the event something goes wrong.
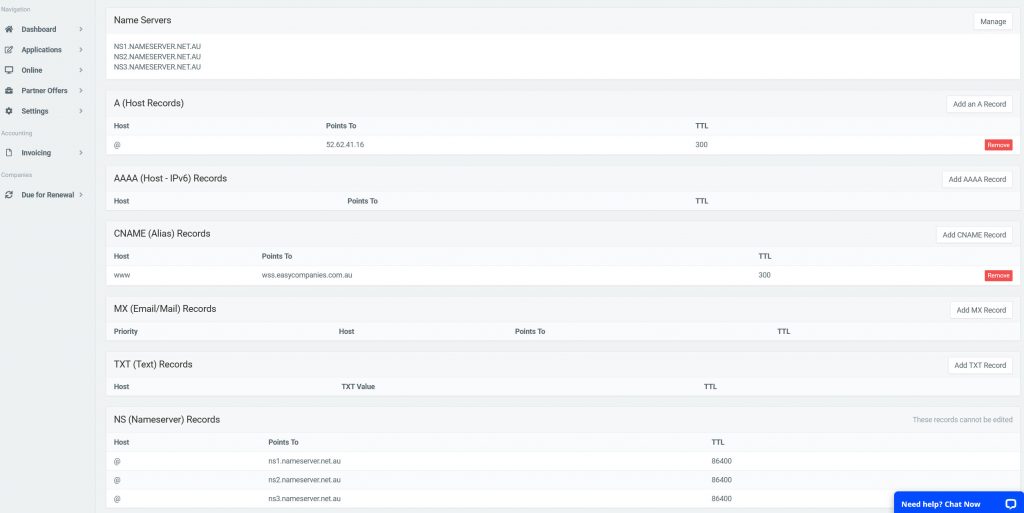
Above is the client’s current records, it always pays to double-check that the records above are actually correct. You can use a handy website called https://www.whatsmydns.net/ to see the live records of a domain name. Once updated we will also be using to Whats My DNS to see when our new records are live.
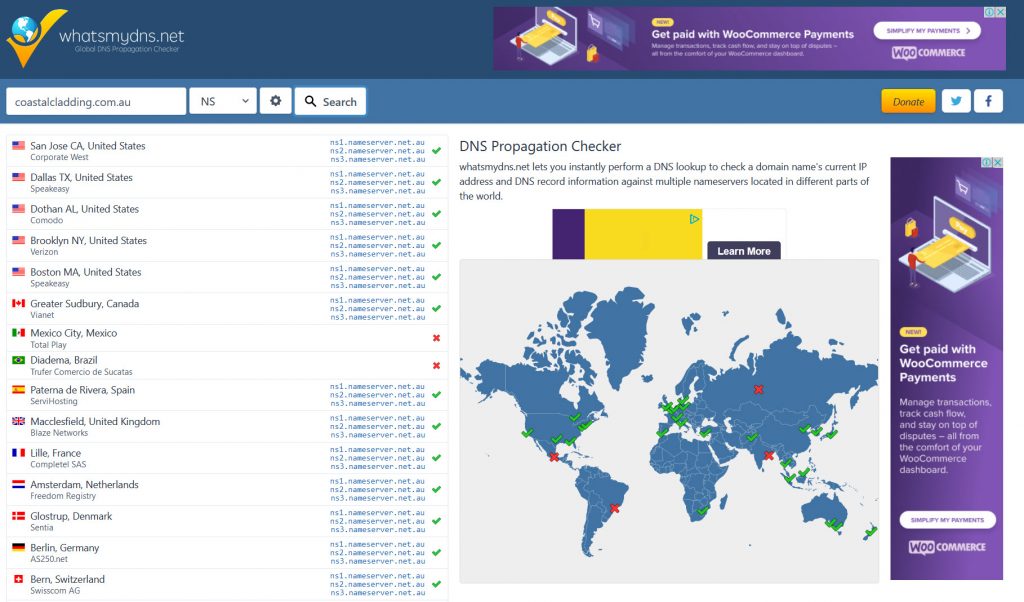
Putting the client’s live domain name into What’s My DNS has confirmed the Name Servers are correct, both in the domain control setting and Whats My DNS show the current name server is: ns1.nameserver.net.au.
Every hosting provider uses different Name Servers, when you purchase a new hosting service the provider will email you what your name servers are.
For this project, we are using VentraIP as the chosen hosting provider. They have a handy section under Overview and Service Details that shows what Name Servers are required for the new hosting service to work.

Sometimes a web hosting provider might have 3 or 4 Name Servers. If you have the option to add them all in then do so, but for the most part, two are only required. The first name server is the primary one that will look up the DNS records so the website and services can load, the other records are essentially backups in the even the first name server is unreachable.
Next, go back into the domain providers management section and update the name servers to point the domain to the new hosting service.
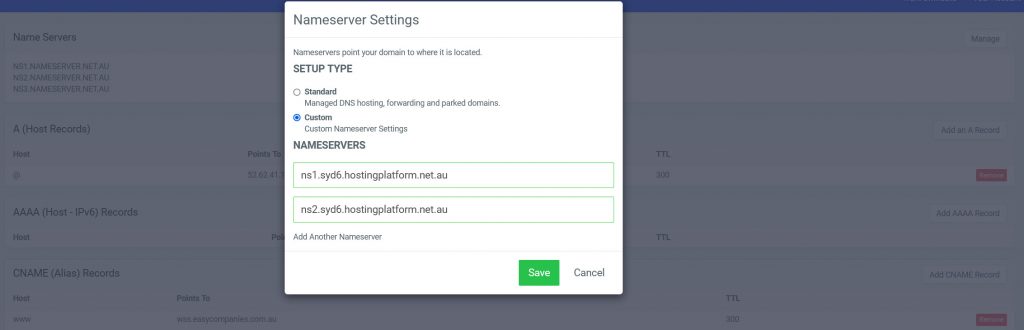
I can’t stress how important it is to backup ALL previous Name Servers and DNS records before making the update, history of old Name Servers or DNS records are not kept in some domain name providers.
Matthew Eva
When you update Name Server records, it can take approximately anywhere between 30 mins to 6 hours for the records to update worldwide. This process is called domain name propagation. Some say propagation can be 24-48 hours but I have never seen it take this long. This is why some websites are launched early morning or late at night. If the website is brand new then there is generally no impact, so the propagation time is fine.
To monitor the propagation of your domain name, use the What’s My DNS service:
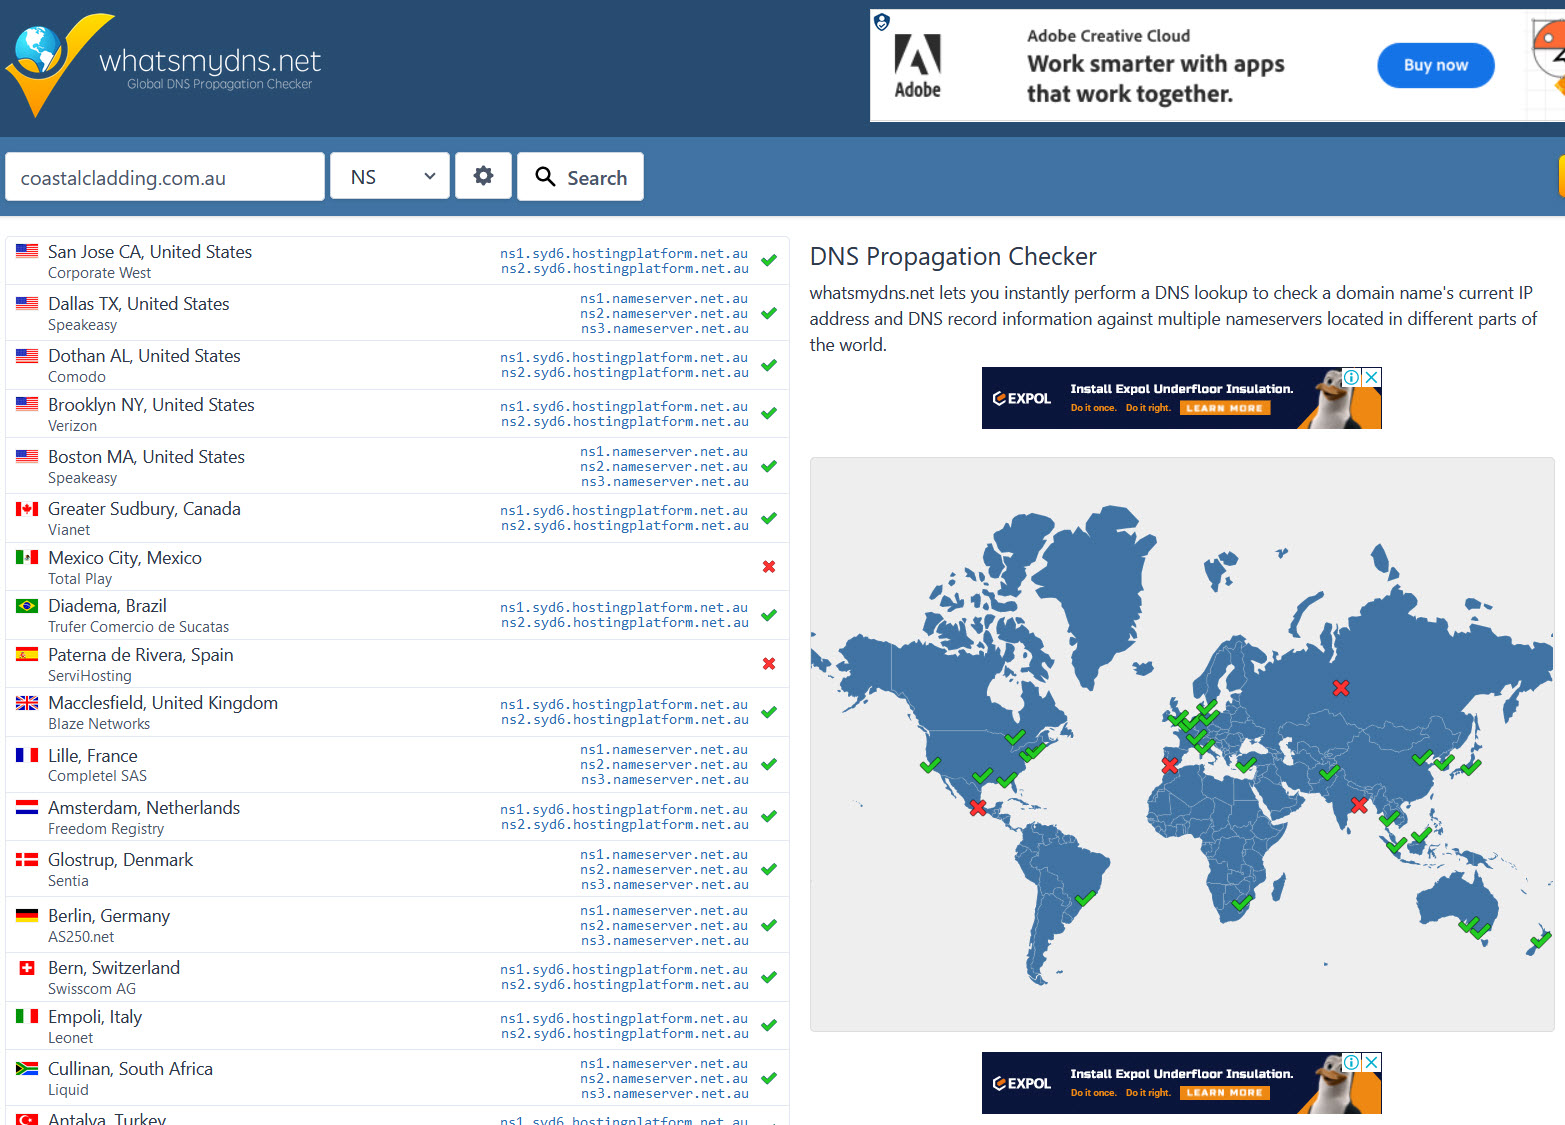
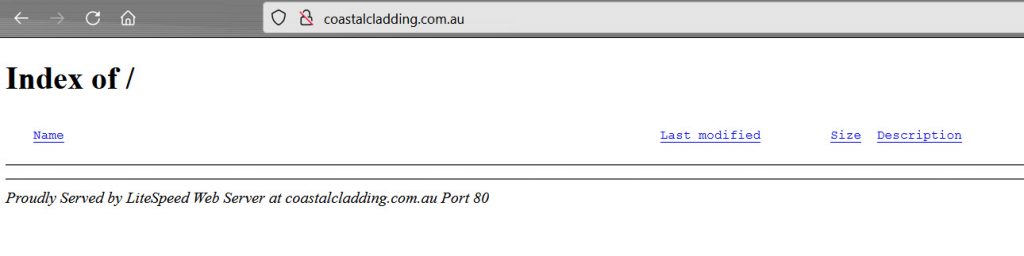
To continue with the launch, you only need to wait until your local Name Servers have been updated, there are a few local DNS hosts in Australia, one being Telstra and once the local record is updated, you can see the empty hosting service when typing in the domain name into your browser.
Sometimes your PC or router might hold old records a bit longer than it should, if you are not loading the new hosting service after about 2 hours, try restarting your PC and Modem or Router. Another great way to check is on your phone with WiFi turned off.
Step 3 – adding an SSL certificate (Optional)
Every website should have an SSL certificate, in my business every website we host includes an SSL. How the SSL is set up is dependant on the hosting provider, some make it easy, and others do not as they want you to purchase one.
For Auto SSL to work usually your domain name needs to be connected to your hosting service, a web server cannot create an SSL for a domain that is not connected to it. Otherwise, someone could buy a hosting service and create an SSL for a say ANZ banking or eBay and use it for fraud/illicit activities online.
For this example with Ventra IP, it’s very easy to configure a free Comodo SSL certificate by using “Auto SSL”.
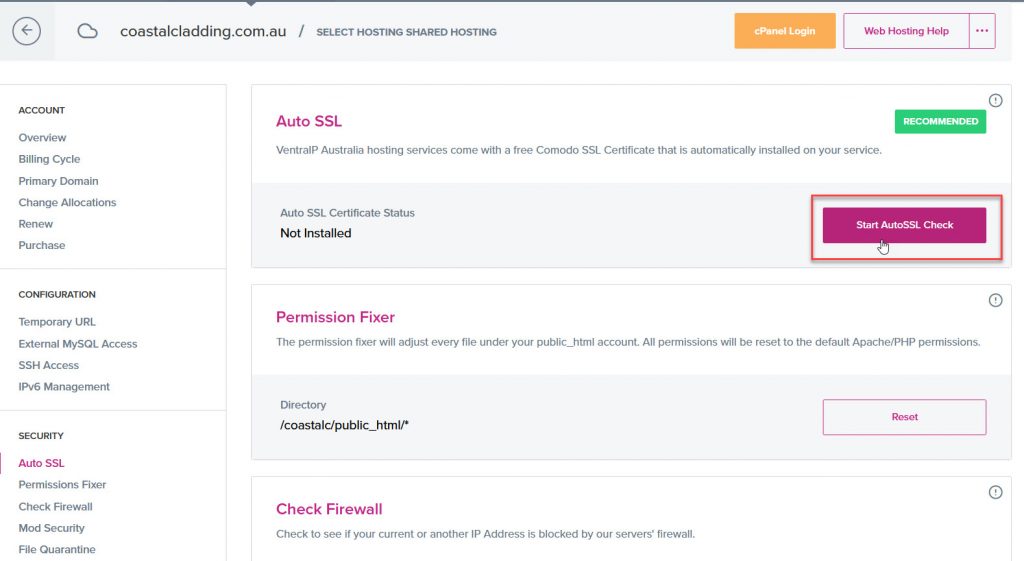
Navigate to hosting services, then Manage, and Auto SSL under the Security sidebar menu. Then click on Start Auto SSL Check.
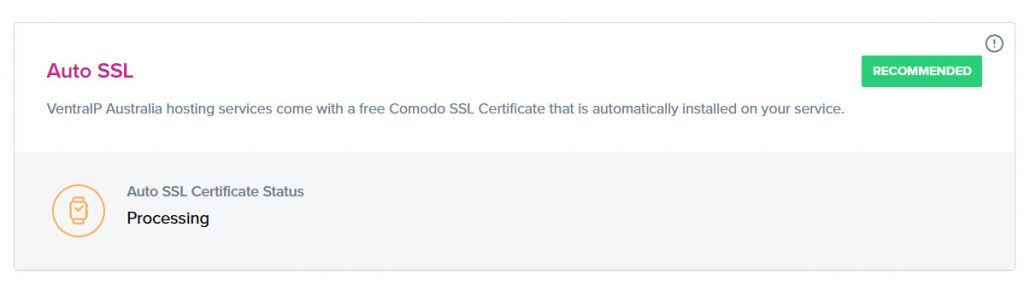
From here the screen will change to processing. Now I have been using Ventra IP for over 10 years, I can’t exactly remember when but when I used to leave the screen it would not work. I don’t know if this is a problem or maybe it was my browser. To check if the SSL has been successfully set up, try to load the domain name with https:// in front and see if you get an error in your browser window.
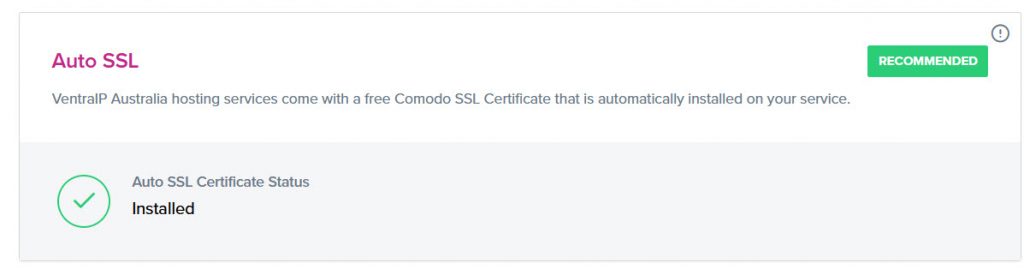
If you can load the domain name under https with no errors, refresh the Auto SSL page on Ventra IP and you should now see the status changed to “Installed”.
Step 4 – Downloading a backup of the development version of the website
Head over to the non-live development version of the website that you need to launch, login to cPanel and we will now download a copy of the website files and the database.
Website Files: If the website you are moving is the **only** website on the server, you can use cPanel’s built-in backup function.
If you have multiple websites on the one hosting service:
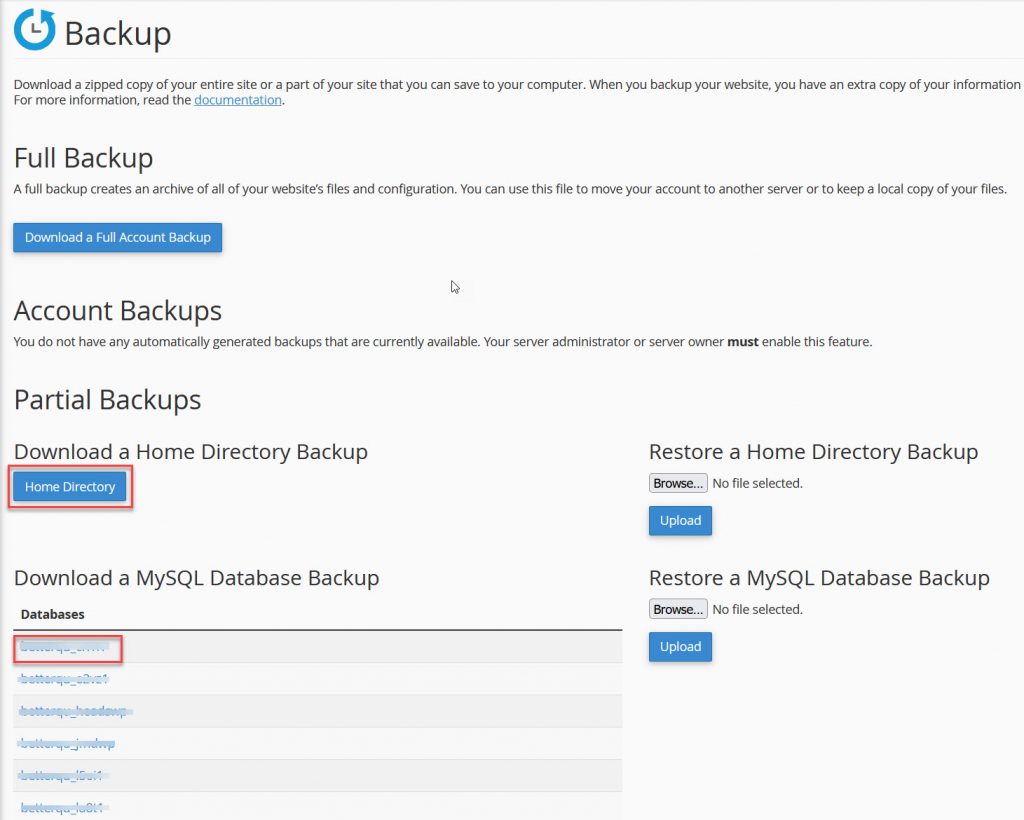
As our website is in a sub-domain, we don’t need to download the entire home directory, as it will download everything off the server, which for us can be up to 10-15 websites. Downloading only the sub-domain folder will only download the website we need to launch.
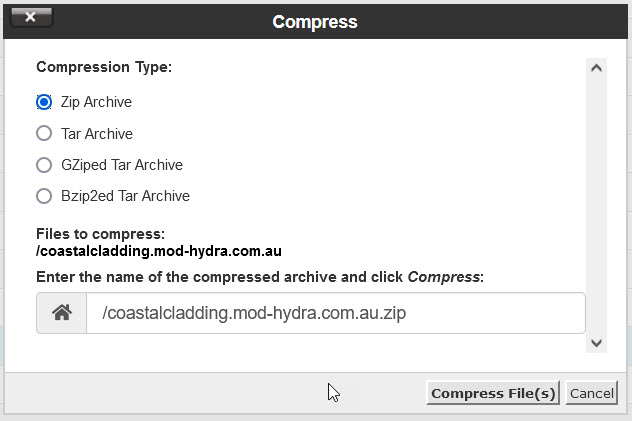
Instead, we compress and download just the subdomain folder.
Next, right-click on the sub-domain folder of the website to be launched and select “Compress”. You can either compress in a Zip or Gzipped formats, both formats remember directory permissions which is ideal for security. Most designers will use Zip format.
Once the folder has finished compressing, download a copy to your PC.
Downloading the WordPress SQL Database:
You can’t Launch a WordPress Site without a database, as it’s essential for WordPress to run. If you have multiple websites like on my development server, you need to know which database to download.
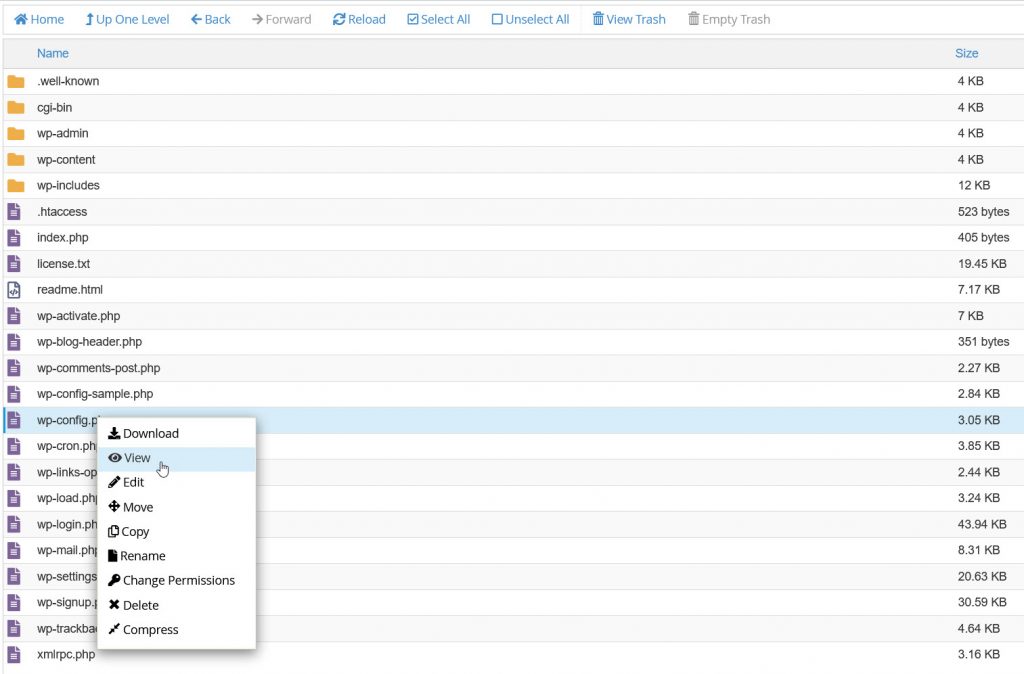
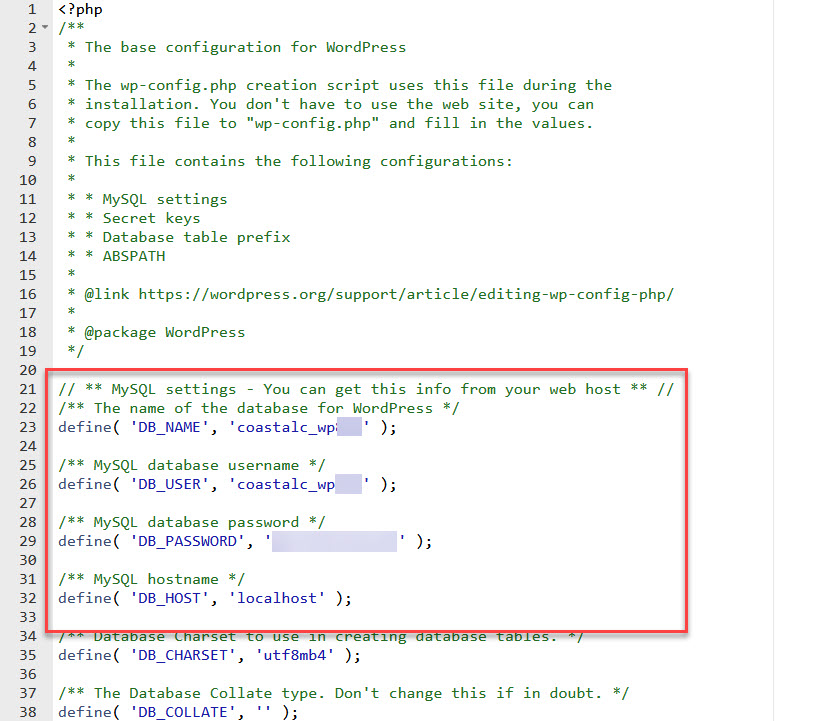
Go back into cPanel file manager, open the sub-domain folder of the website you are launching, and right-click the wp-config.php file and select view.
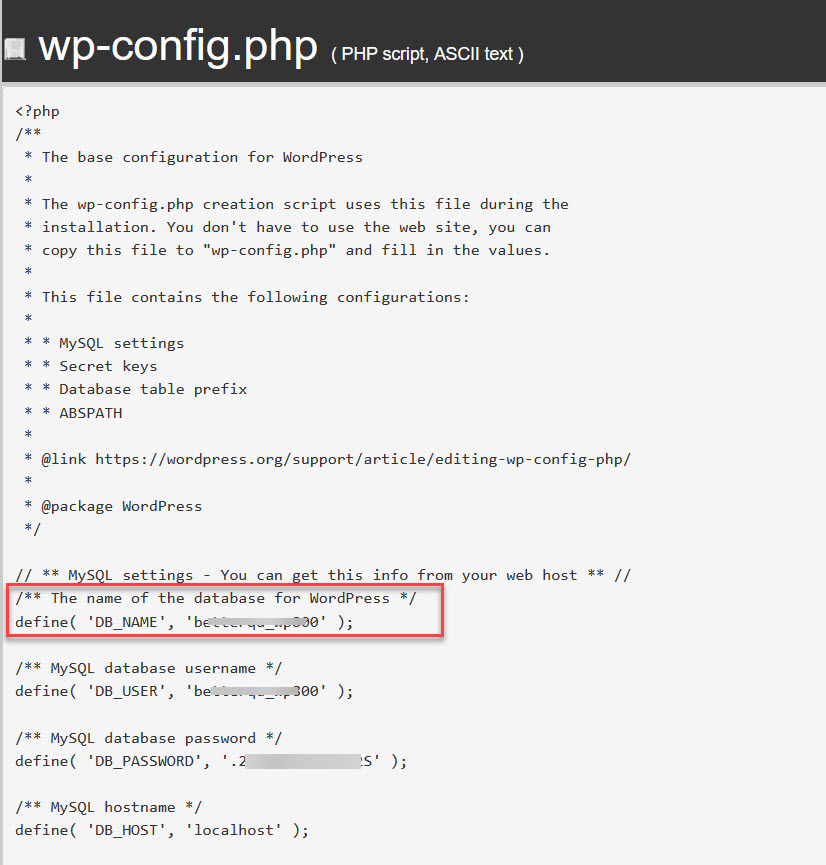
Now that you know the database name, navigate back to cPanel’s backup screen and download a backup of the database.
Now that you have a copy of the WordPress Database, Home Directory OR Sub-Domain files, next it’s time to upload it to the new hosting service.
Step 5 – Uploading the website to the new hosting service.
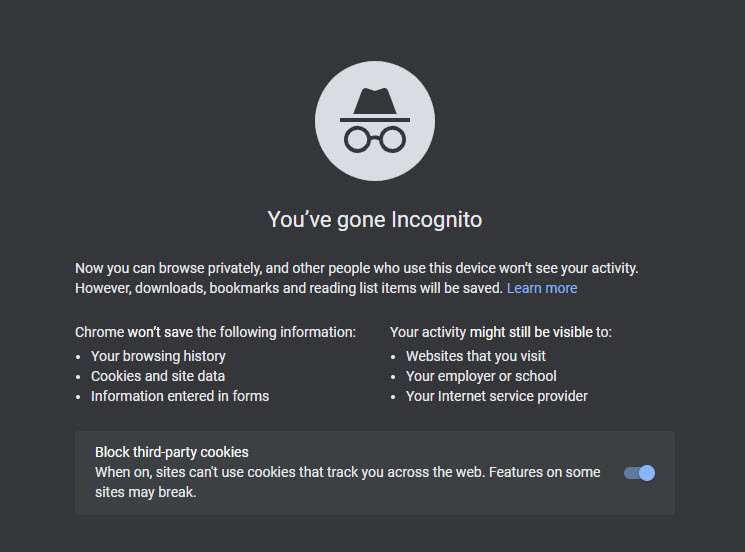
Moving forward, in this stage, it’s best to start using a private/incognito window to check the progress of the website launch. If you don’t use a private/incognito window your browser might keep cache and cause the new website to redirect to the old one which can be a pain in the arse.
Uploading the WordPress files
First, we upload the WordPress files, then in Part 2, we upload the database.
Login to the new/destination hosting service and navigate to cPanels File Manager
As we are launching the website onto the primary domain name, we will not be uploading into a sub-domain.
The root folder where the contents of a website are stored is known as “public_html”. It is possible to upload a website into a sub-domain folder and have it load through the primary domain, although that’s for a more advanced WP installation.
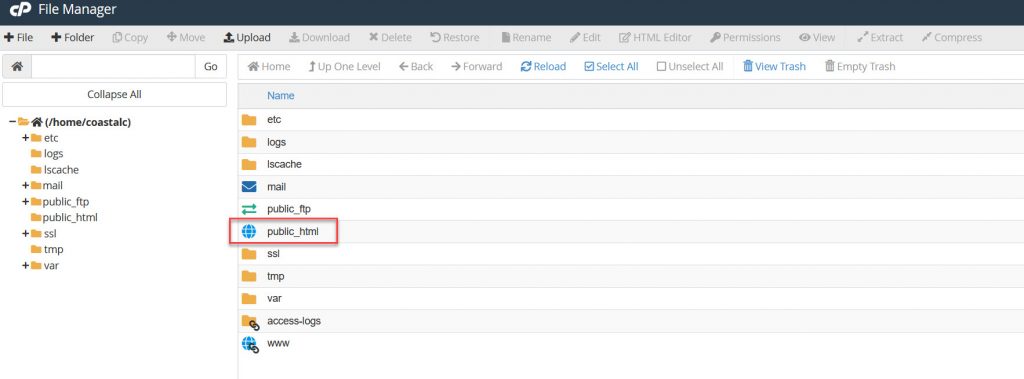
Once in the public_html folder, it should be empty. If you see files in the folder it could mean there was an old website on the server (unlikely if it’s a brand new hosting service). If it’s not a new hosting service, create a folder called “old” and move the old website files in there so the directory is clean and ready for the new website.
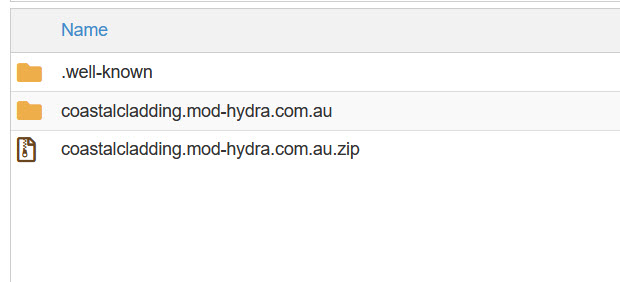
Hidden Files
Web server directories have hidden files in them, for example: .well-known which is used by cPanel for storing Auto SSL data. And .htaccess which is used to control various permissions and server functions.
To double-check if you have any hidden files, click on “settings” in cPanel file manager.
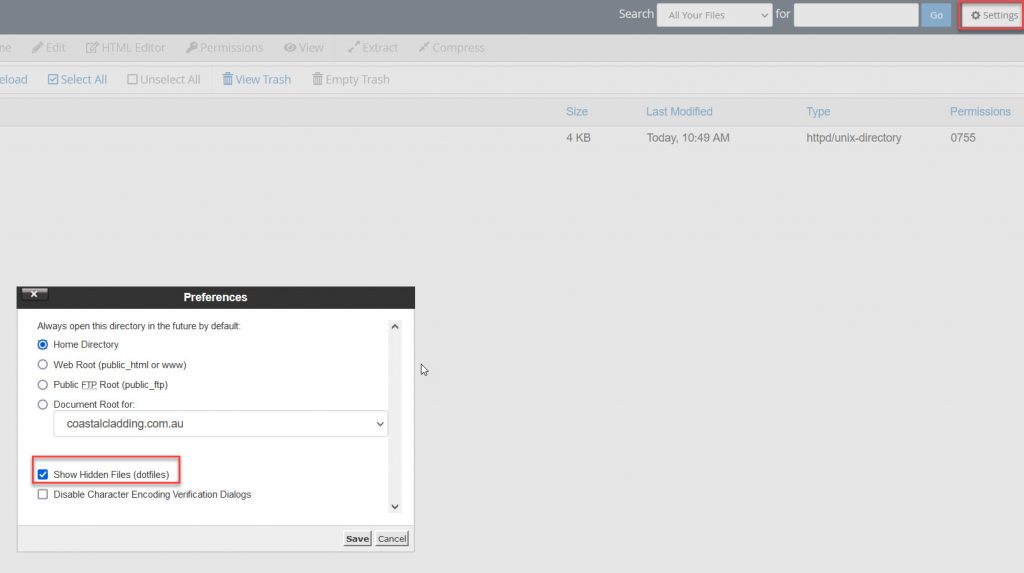
Make sure the “Show Hidden Files (dotfiles)” checkbox is ticked.
If you do see hidden files, you can also move a copy of them into the “old” backup folder.
Back to the upload, click on the “Upload” button in cPanel file manager:
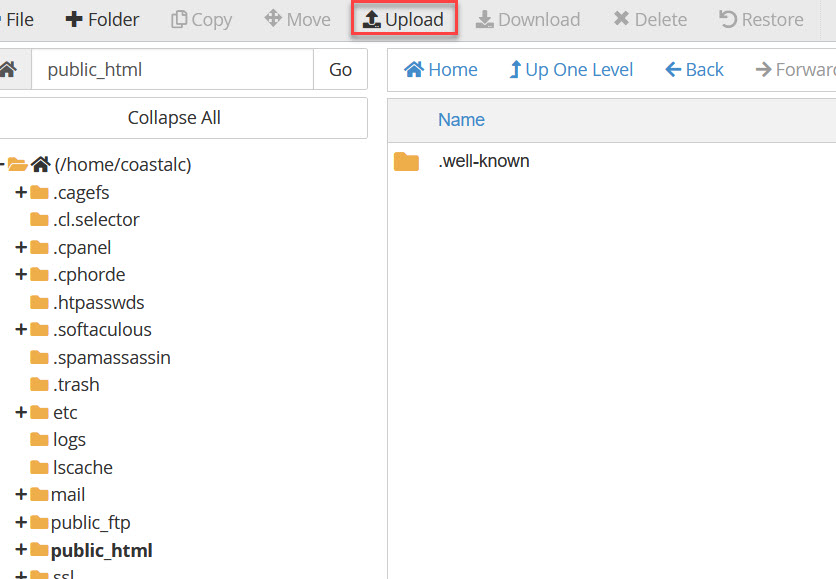
Select the backup zip file from earlier, make sure you upload only the website files and not the database (sql.gz) as that gets uploaded to a different area.
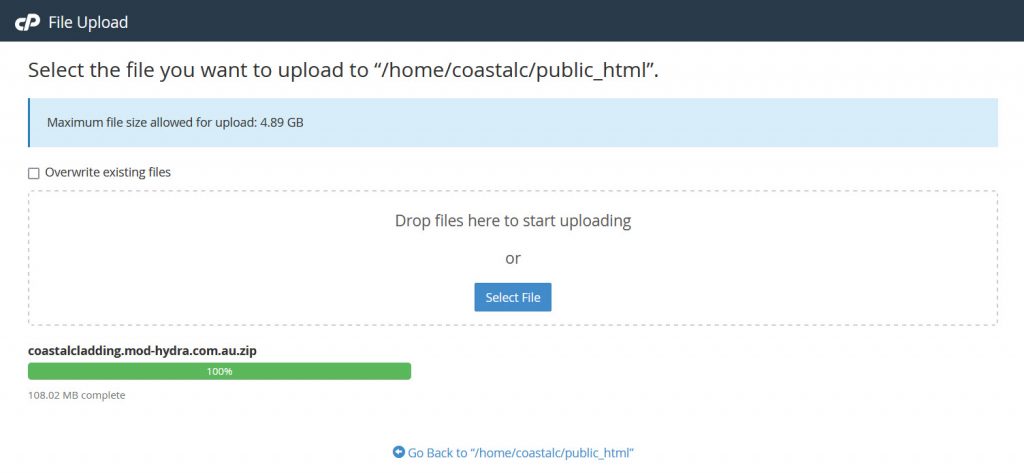
The time it takes to upload the website files will depend on the size of the website, the speed of your internet and the speed of your hosting service. I have seen some really crap hosting companies like GoDaddy take 1 hour to upload 300mb… Pathetic.
Once the zip file is uploaded, click the Go Back to /public_html link.
You should now see your zip file in the public_html folder, if it doesn’t appear right away, don’t stress as some web servers have through anti-virus scanning systems, it may take up to 5 mins for your zip file to appear.

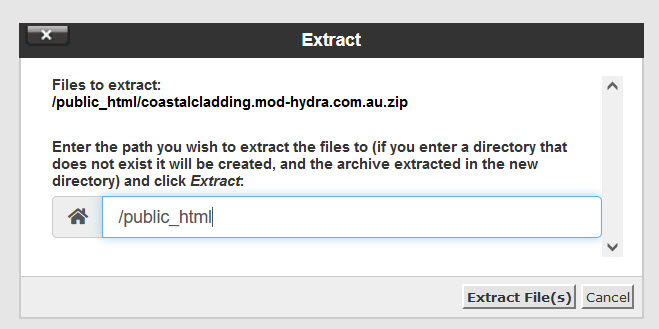
When the extraction is complete, you will see an Extraction results window, you can scroll down to check for any errors, if there are none, then close the window.

Open the sub-domain folder or the folder your files were extracted into, in some circumstances you might extract public_html into a public_html folder, which means your website files would be located in /public_html/public_html/. Know by web designers as (public_html_inception)
Remove the / path so it only shows “/public_html/” as per the above screenshot and click move files.
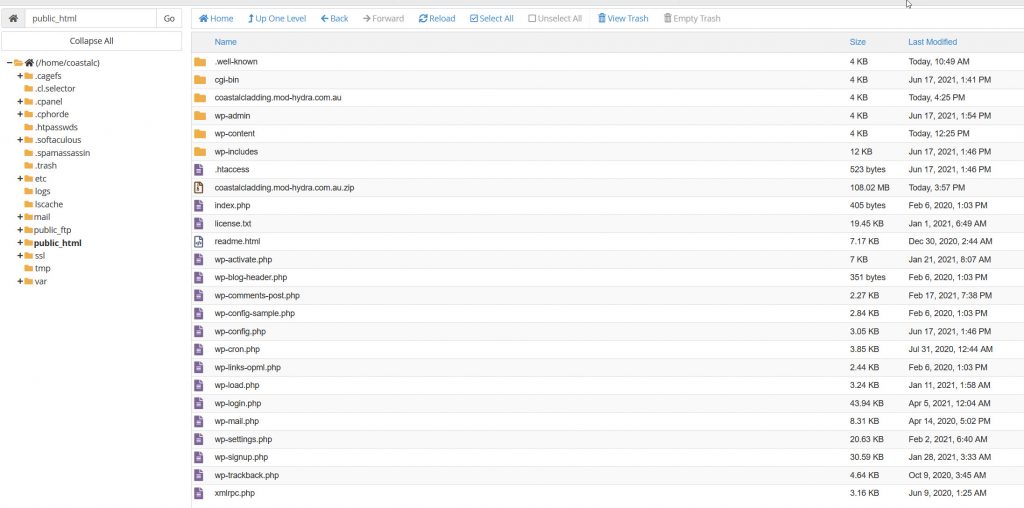
Navigate back to the public_html folder in cPanel and you should now see your WordPress files in the right place.
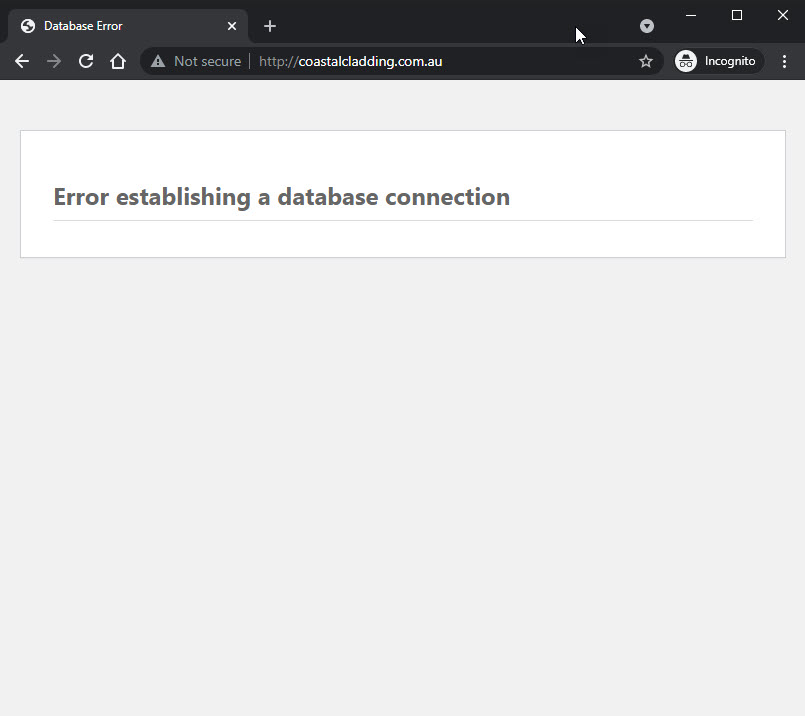
Checking the files are in the right place
To confirm that the files are in the right place, open a new incognito window and try to load the domain name.
You should get an “Error establishing a database connection” message, which is normal as we haven’t uploaded the database yet.
Step 6 – Uploading the WordPress Database to the new hosting service.
Before we restore the backup of the database we downloaded in Step 4, I like to create a blank database first on the new server, then rename the old database to the name of the new blank one, then restore the data.
It’s important to understand how a database is named. Website SQL databases have a prefix to their name, this usually reflects the hosting service that it’s on.
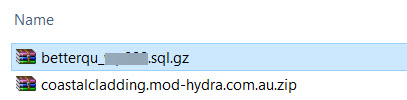
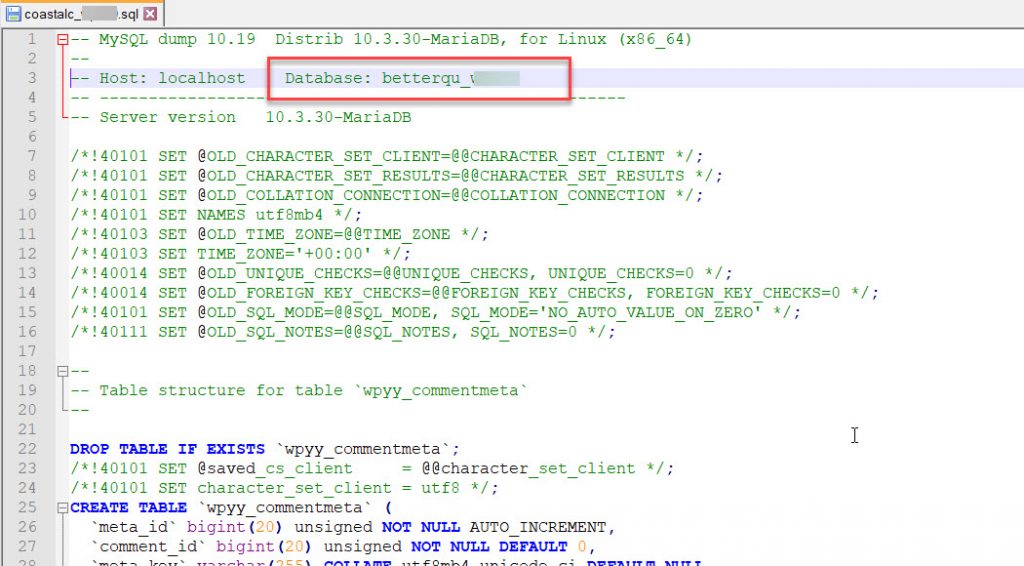
As per above, the name prefix to the database we downloaded was “betterqu_XXXXX.sql.gz” I blurred out the database name for security reasons, usually, a database will have a name like betterqu_wp1234.sql.gz.
This name will change as it will need to suit the new hosting service. “XXXX” in the filename reflects the name of the database after the prefix. Take note of this name as we will need it in the next step.
NOTE: the word prefix is used ofter with databases, two common names in WordPress SQL databases are Name Prefix and Table Prefix. These are two different things, a name prefix is completely different. Right now we are working with the “Name Prefix”. For the majority of WordPress website launches, you will never need to adjust the table prefix unless you are connecting a database to a dissimilar set of installation files
Don’t worry too much about trying to fully understand prefixes, let get onto creating a blank database.
Creating a blank database
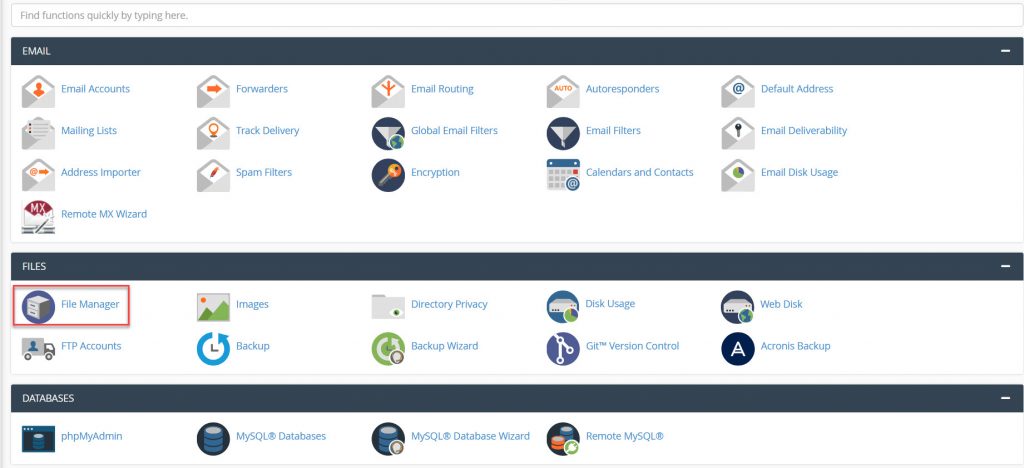
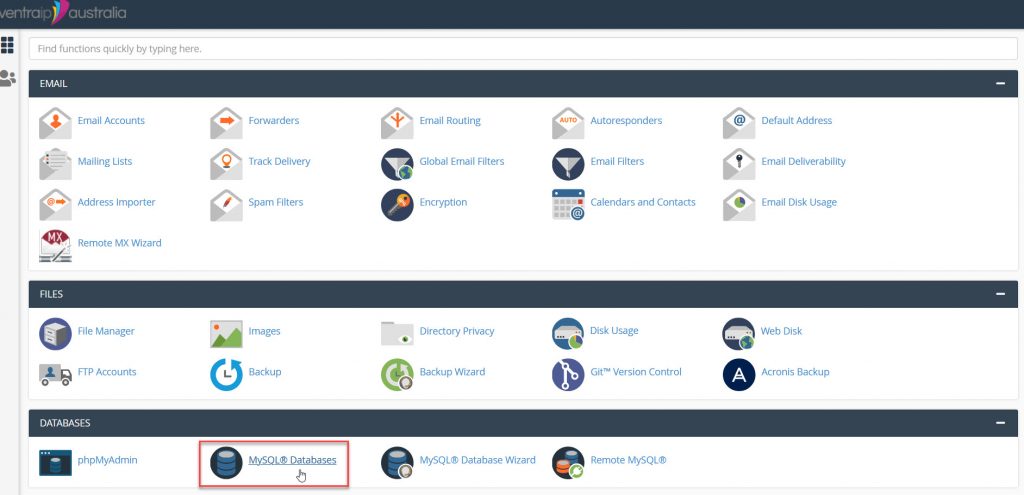
Navigate to your main cPanel homepage and under the Databases tab, click on “MySQL® Databases”
On this screen, there is an option at the top to create a new database, when entering the database name, use the “XXXX” name you took a note of at the start of step 6. Only enter the database name and not the prefix.
You will notice on this screen, the database name prefix is not editable as it’s set as a part of your hosting account.
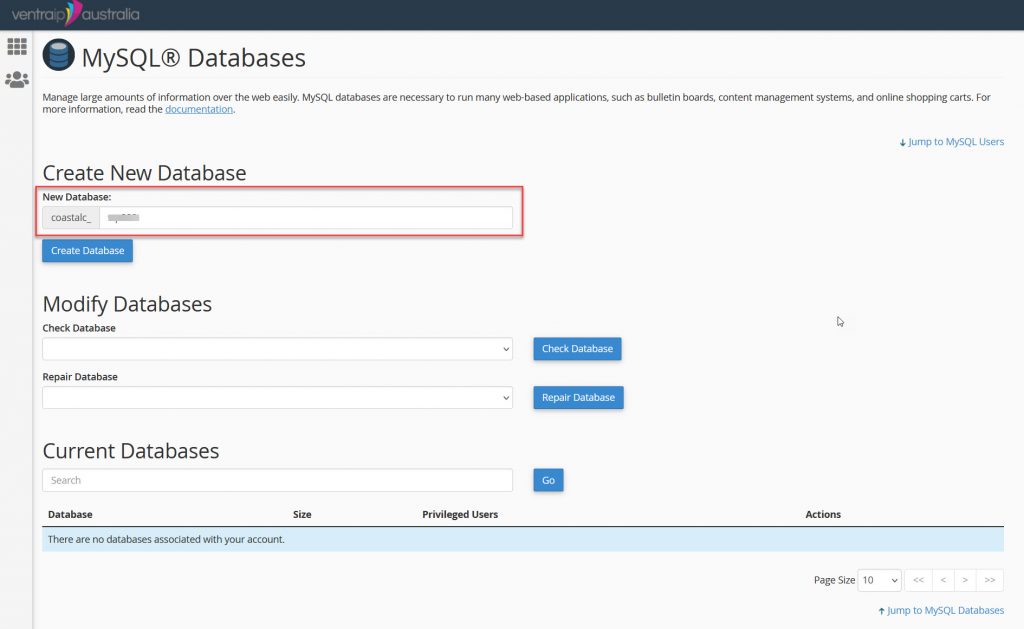
Once the Database is completed you will see a confirmation screen like below:

Setting the database name prefix
As the new database uses a different name prefix, we need to update the database we plan to upload.
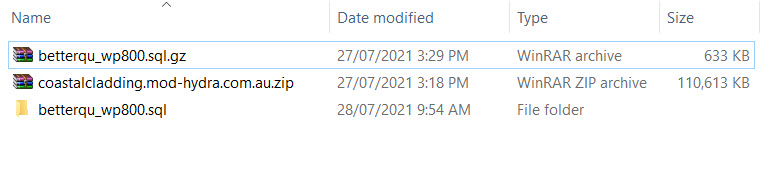
Open the folder and you will see the SQL database file.

- Right click the file and update the prefix like below:

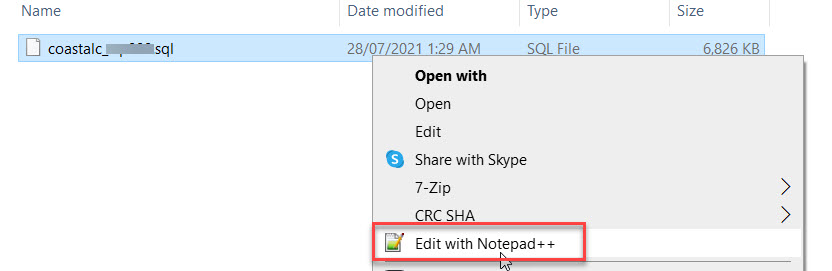
You can open the database in a notepad, I prefer to use notepad ++ which can be downloaded for free here: https://notepad-plus-plus.org/downloads/
In Notepad ++ on line 3 of the database, we can see the database name still contains the old name prefix.
Update the name prefix to match the new database filename like below:
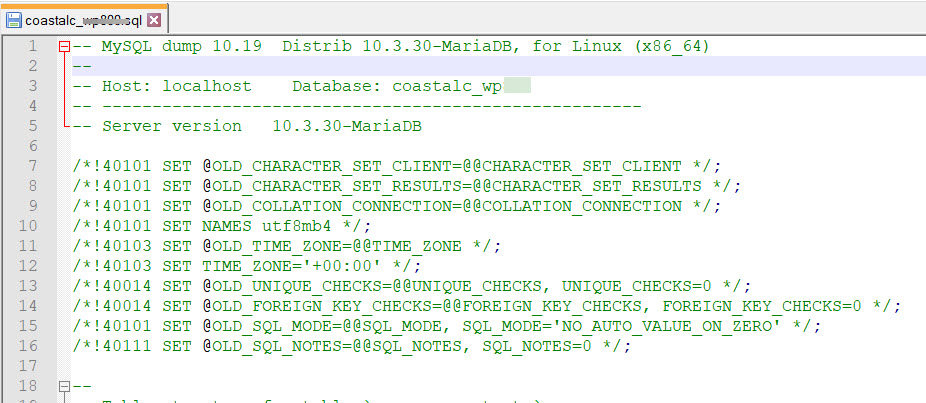
That’s it, the database name prefix is now updated. Save the SQL database file and we can now upload the database.
Head back over to the cPanel home screen and navigate to Backup:
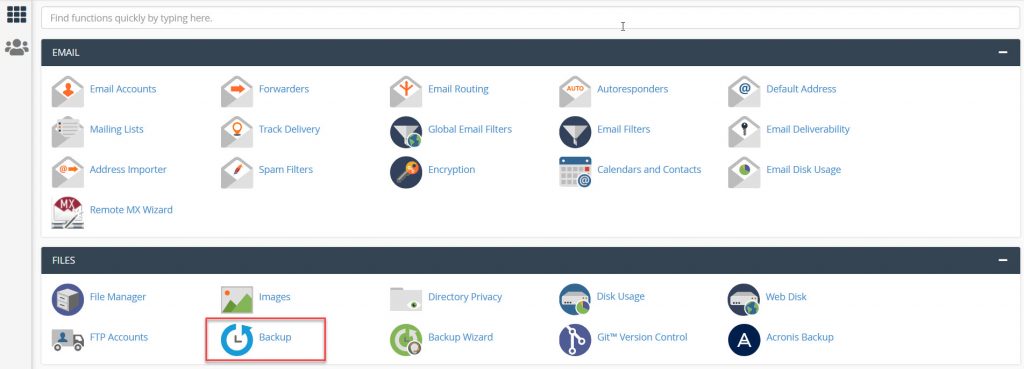
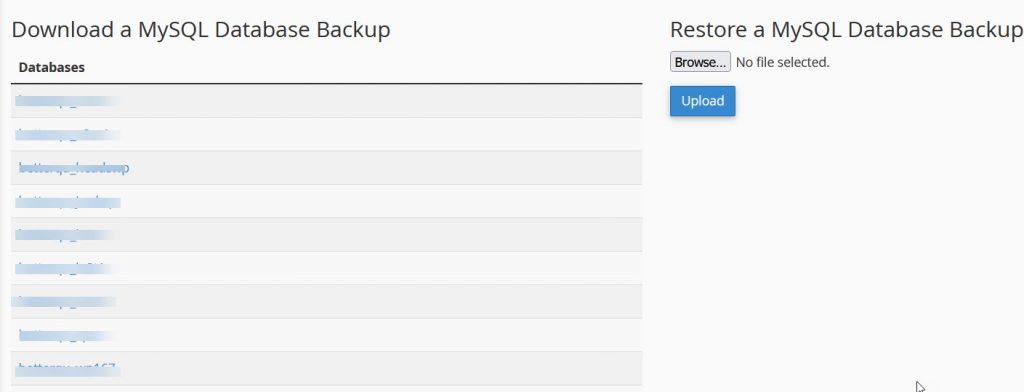
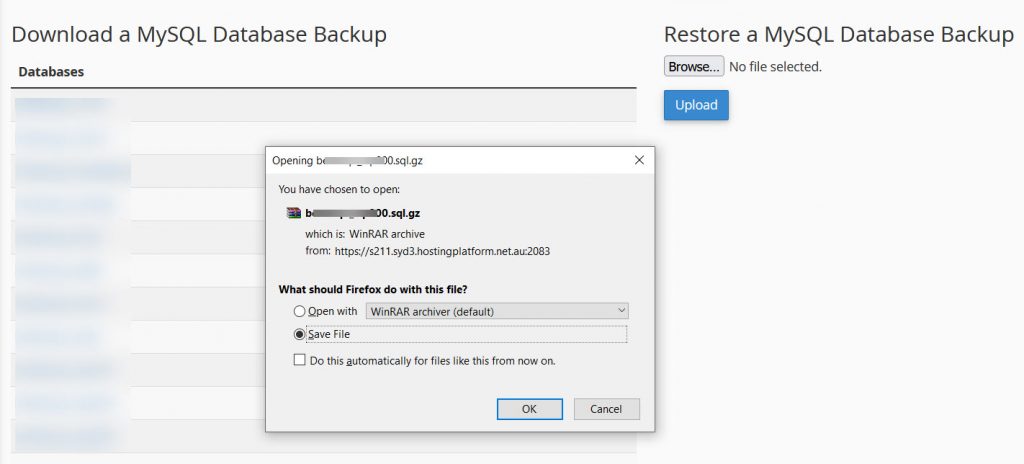
In the backup screen, we can see our new blank database on the left, and to the right, there is an option to “Restore a MySQL Database Backup” Click on this and select the database we have edited and need to upload.
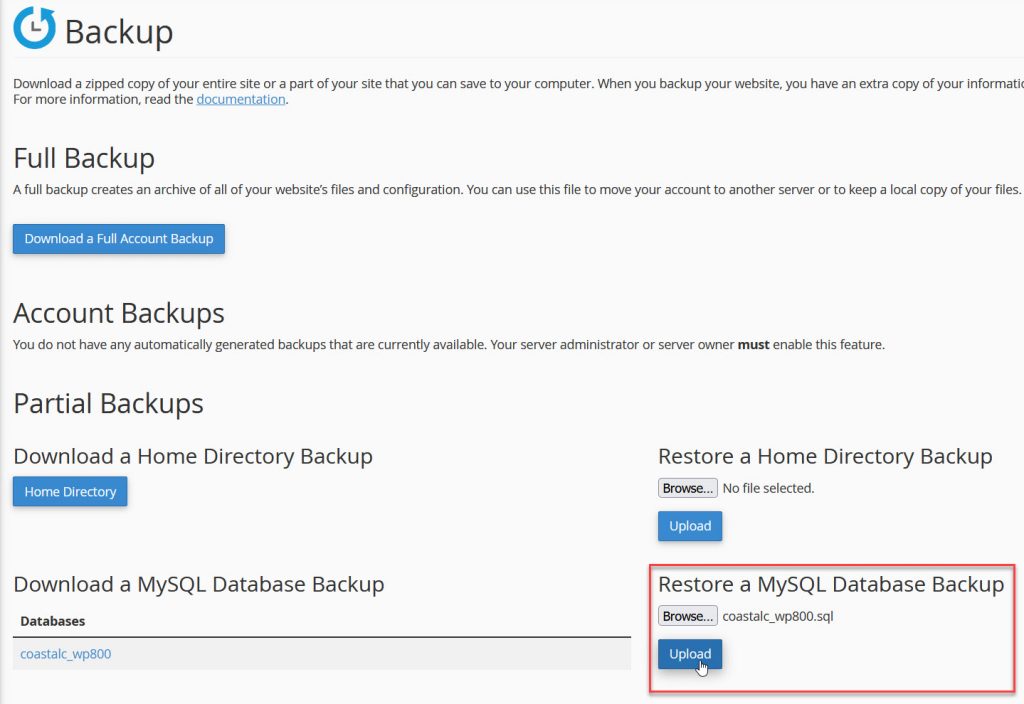
Click upload, a little wheel will begin to spin with “restoring”. Once completed you will see a success message like below:

If the name and name prefix was correct and matched, only one database will appear on the left. If the SQL filename or name prefix in the database was incorrect you may see a second database appear on the left. If this happens, delete all the databases and start again.
7. Create a database user and adding permissions – Launch a WordPress Site
You can upload a database to a web server but without a user account with the correct permissions, it can’t do anything.
Creating a user account for the database allows WordPress to access, read and update the database as needed.
Head back over to the cPanel home screen and navigate to MySQL® Databases:
MySQL® Databases screen, scroll down to the MySQL Users section.
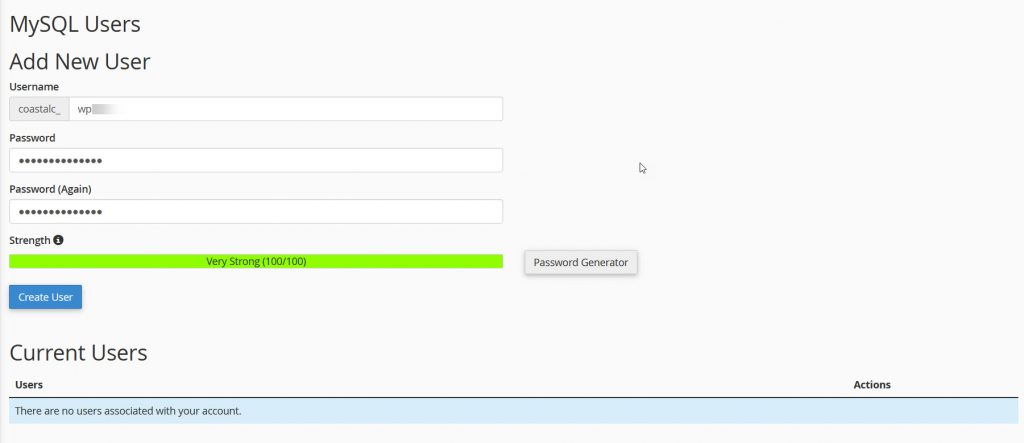
An SQL user account is also reffered to as a system account, its used by the WordPress system to access its database, this account is completely different to WordPress admin or user account.
You can use a unique name for the username if you like, I tend to make the user name the same as the database name for easier management. Others may disagree, however, if you have ever used one of cPanel’s automatic app installers for WordPress they do this by default.
Create a password or use cPanel’s Password Generator, I usually set a minimum password length of 14 characters.
Important: Save the username and password in a safe place as we will need to enter the credentials into WordPress config later on.
Giving permission to the new user account:
Our new user account is created but it currently doesn’t have any permission to access or edit any databases.
On the MySQL® Databases main screen, scroll down to the “Add User To Database” section.
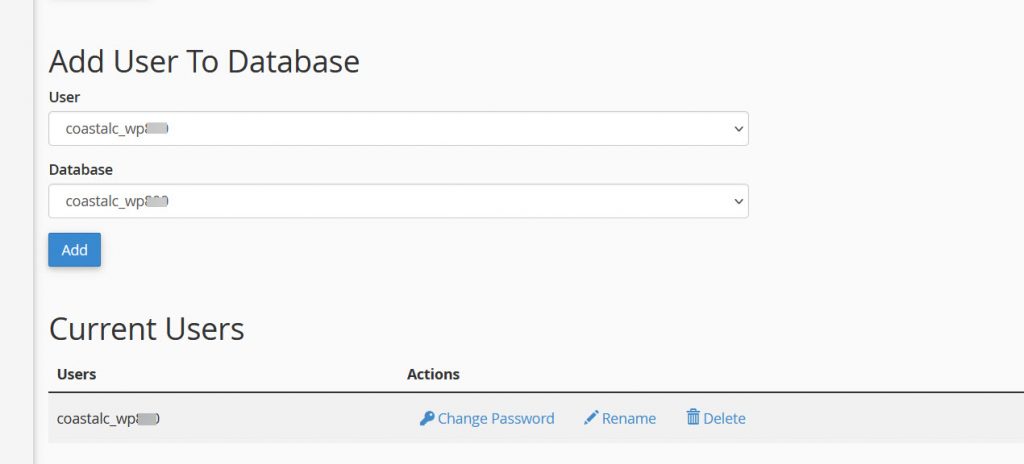
If the user account and SQL databases are the only ones on the server, it will default to them. If not, make sure you are adding the correct user to the correct database. If they are correct, then click add.

By default, WordPress requires “All Privileges”, Unless you have a very customised WordPress installation.
Select the “All Privileges” checkbox and then click make changes.
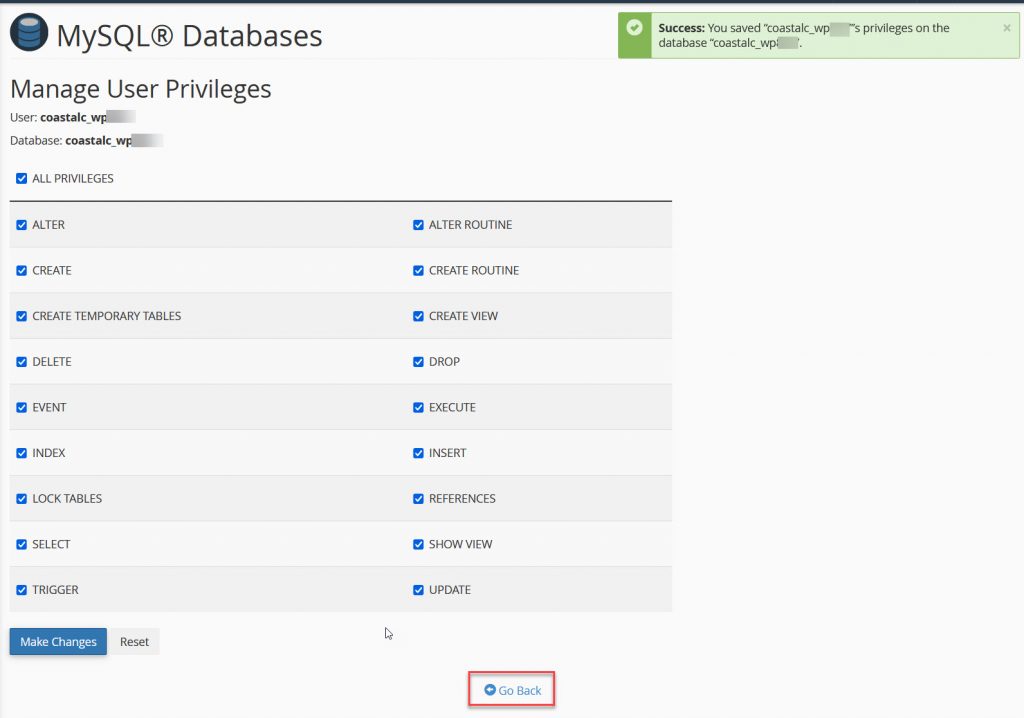
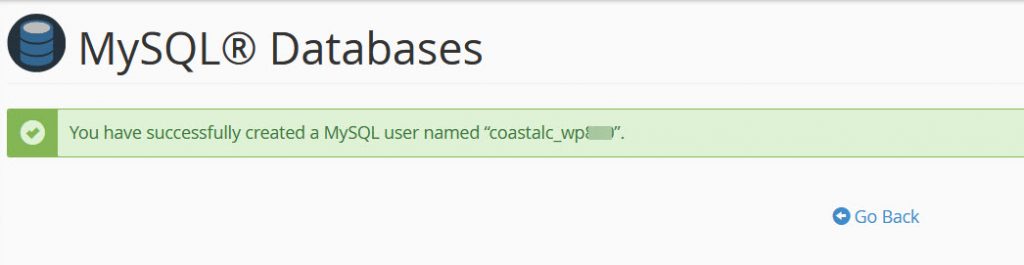
A Success message will appear on the top right, once completed click Go Back to the main MySQL® Databases main screen.
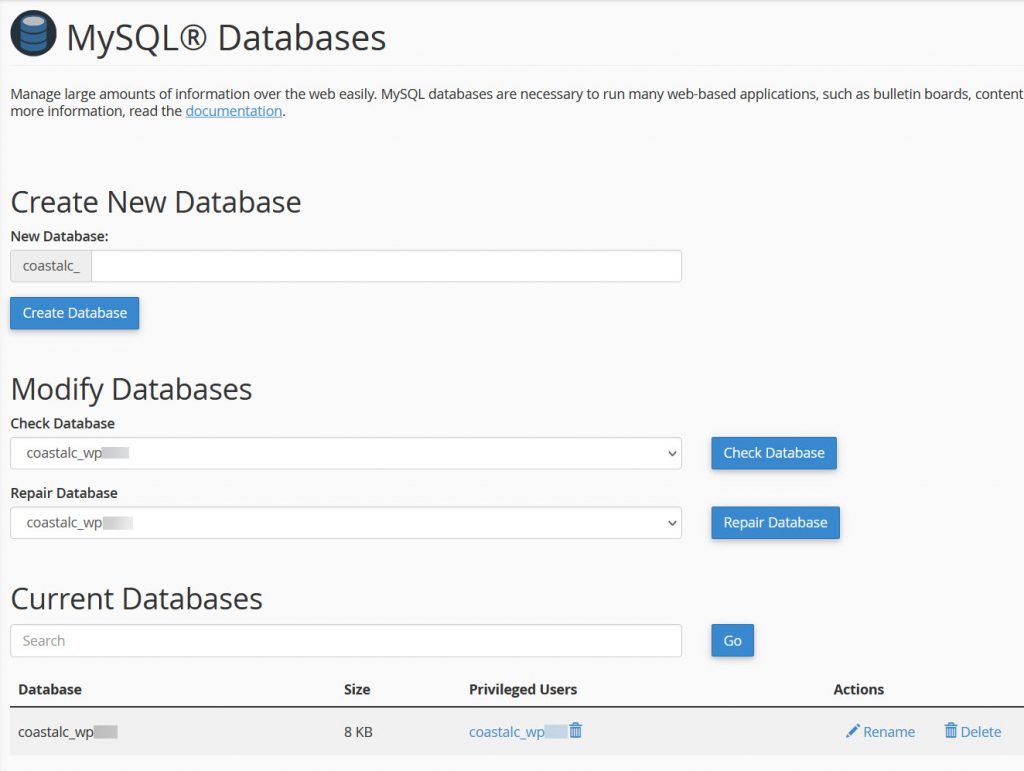
On the main MySQL databases screen you can now see our newly created user is now a privileged user of the database.
The Database is now restored and configured in cPanel, next we can move on to the next steps to launch a WordPress site, adding the new information into WordPress.
8. Adding the new database information into WordPress
SQL Database and User information are stored in WordPress wp-config.php file.
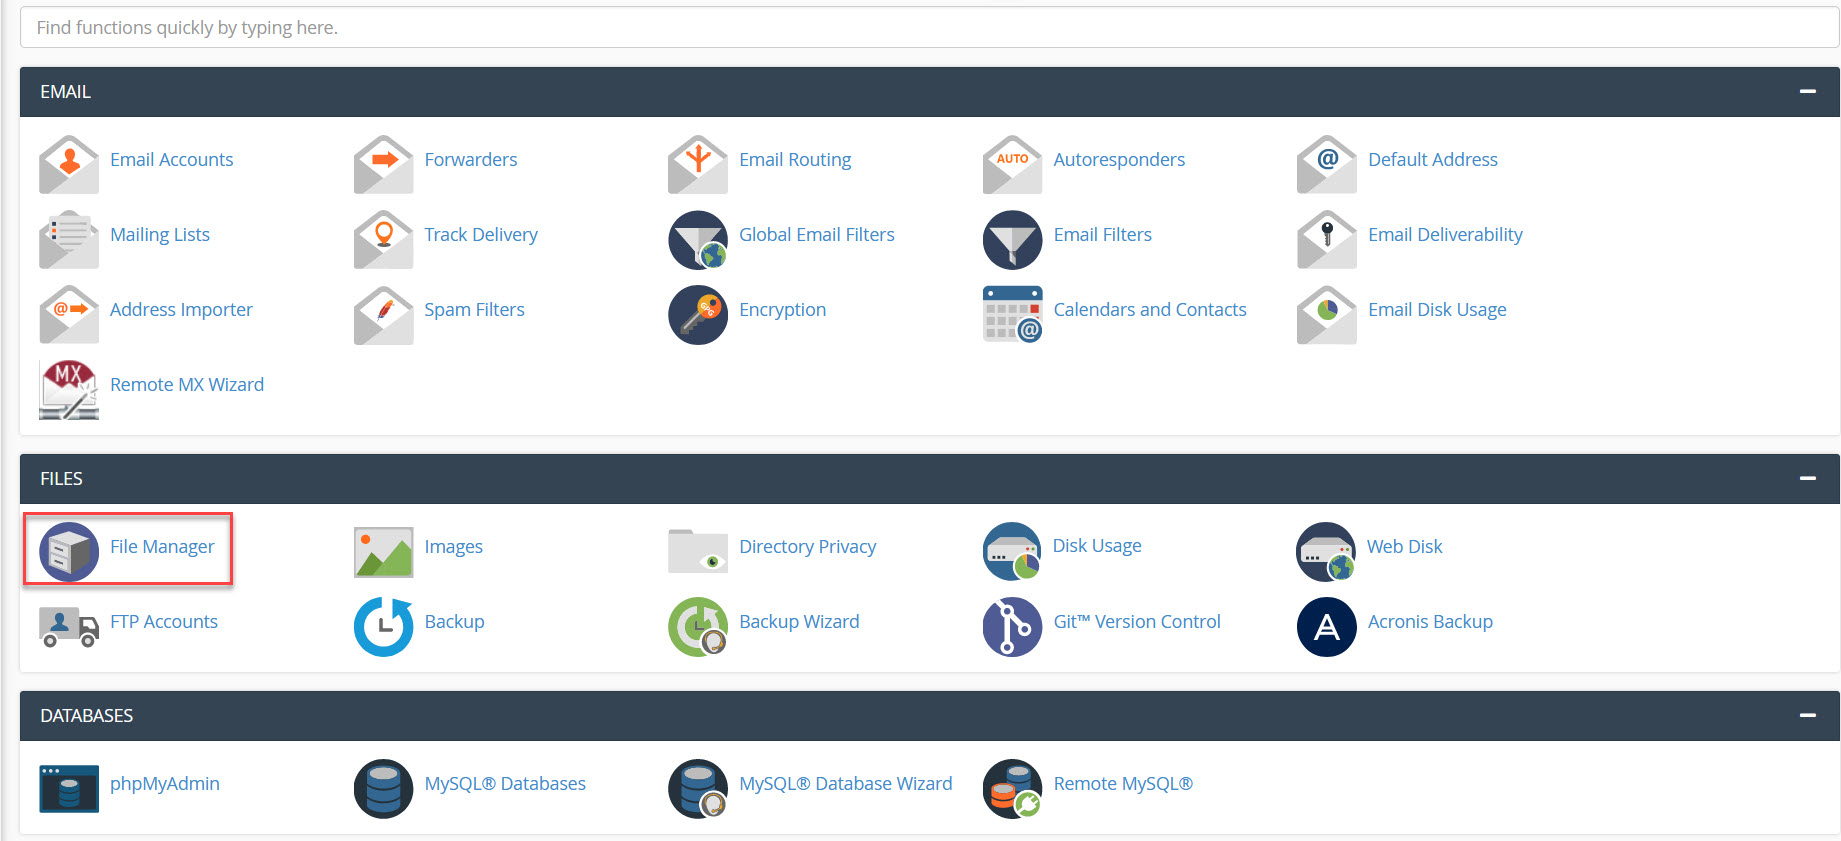
Navigate to the cPanel home screen and then into file manager:
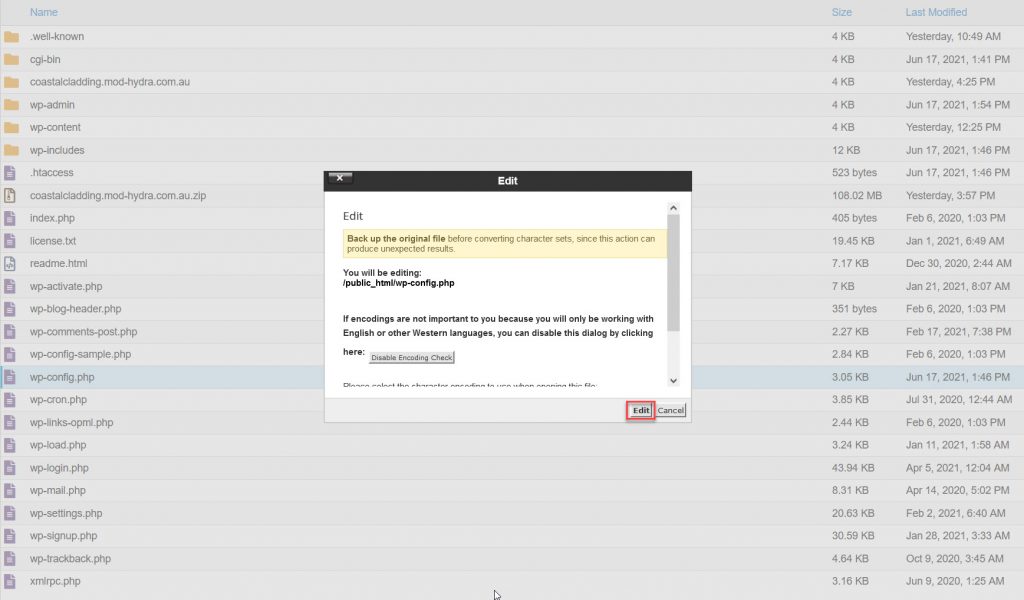
Open the public_html folder. You should see a file called wp-config.php, right-click and select edit.
In the editor, you can see the database and database username contain the old prefix, we need to update these to match our new user account. The password will also be outdated.
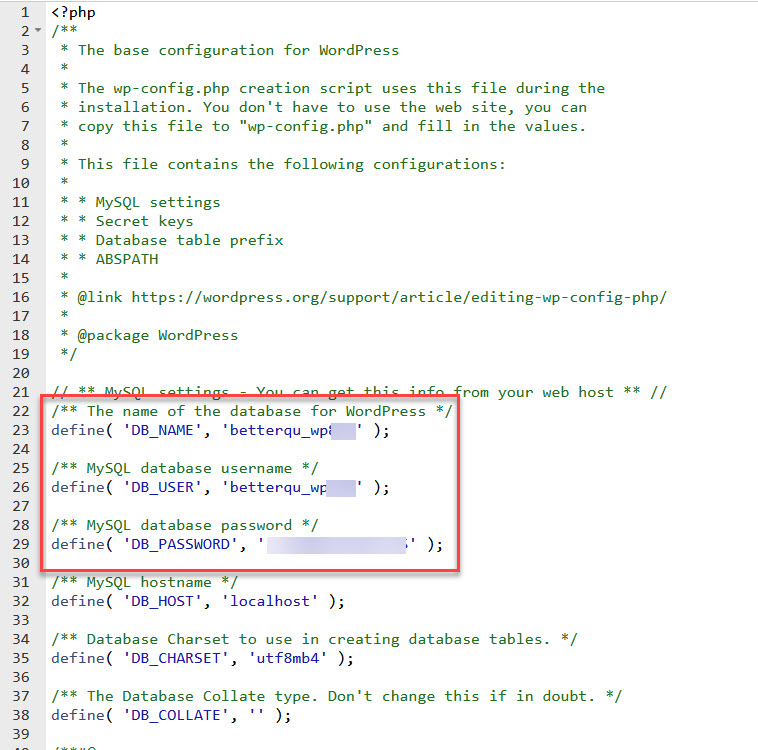
Note: the values for each it is entered between apostrophes, if one is missing or there is a blank space before or after the values the database will not load or you will get a permission error.
Once the information is updated, save the file and close the editor.
To test the above information, open a new incognito/private window and try to load the new website URL. If the information is correct, the website should load but redirect back to the old/dev URL.
This is completely normal as we now need to update the main URL in the database.
9. Launch a WordPress Site – Updating the WordPress Site URL and Home tables.
In the WordPress database, there are two entries, one which contains the location of the WordPress files and another that sets which domain name the website is going to load under. We need to update these to match our new website URL.
Navigate to the cPanel home screen and open phpMyAdmin:
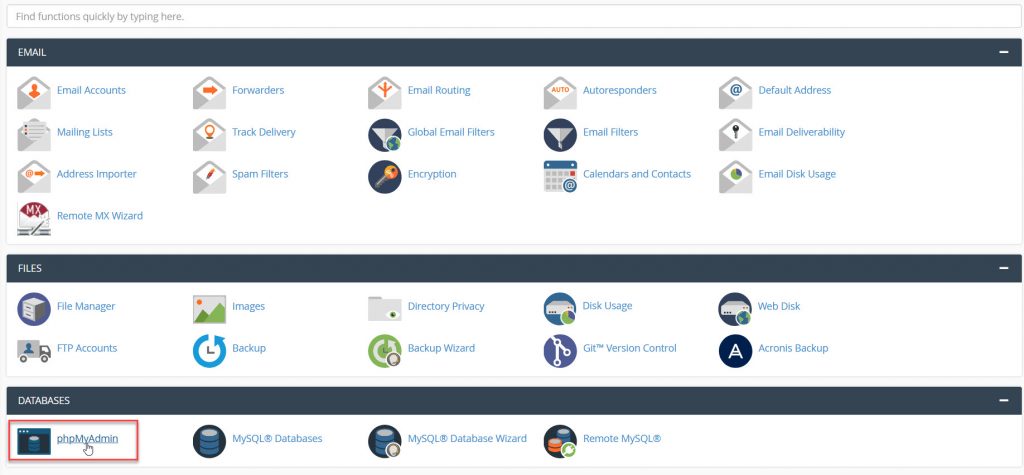
phpMyAdmin is a free and open source administration tool for editing MySQL and MariaDB.
https://en.wikipedia.org/wiki/PhpMyAdmin
Once phpMyAdmin has loaded, a list of databases and the tables they contain are listed on the left-hand side menu.
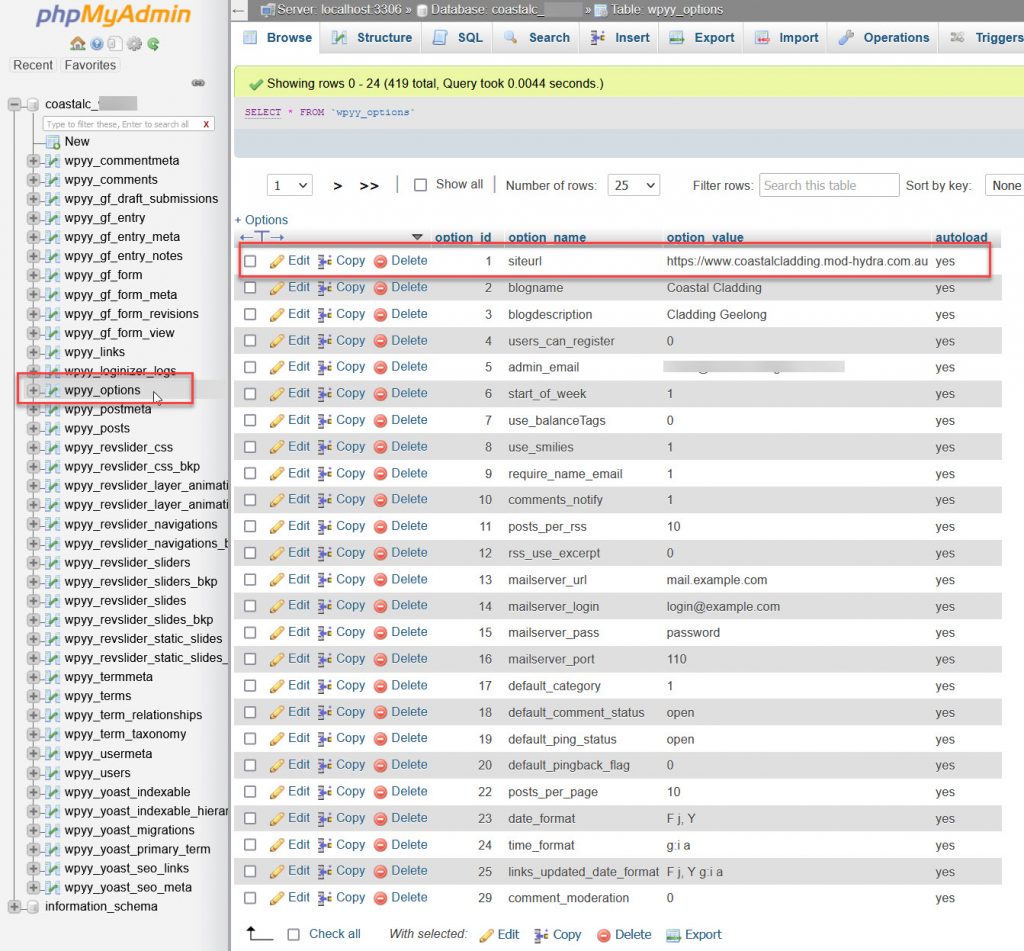
The table which contains the entries we need to edit is called wp_options.
Remember how previously I mentioned that the database name prefix is different to the database table prefix?
Well, some auto-installers of WordPress might change the table prefix slightly. As per the above screenshot, we can see that my wp_options table is actually called wpyy_options. This makes no difference to how WordPress of the database works. It’s just good knowledge to know you have the correct table open.
Once you click on the options table the entries/rows will now show on the right-hand side.
The first entry should be “siteurl” and under the “option_value” it will display the old URL.
Click on the edit button for that row.
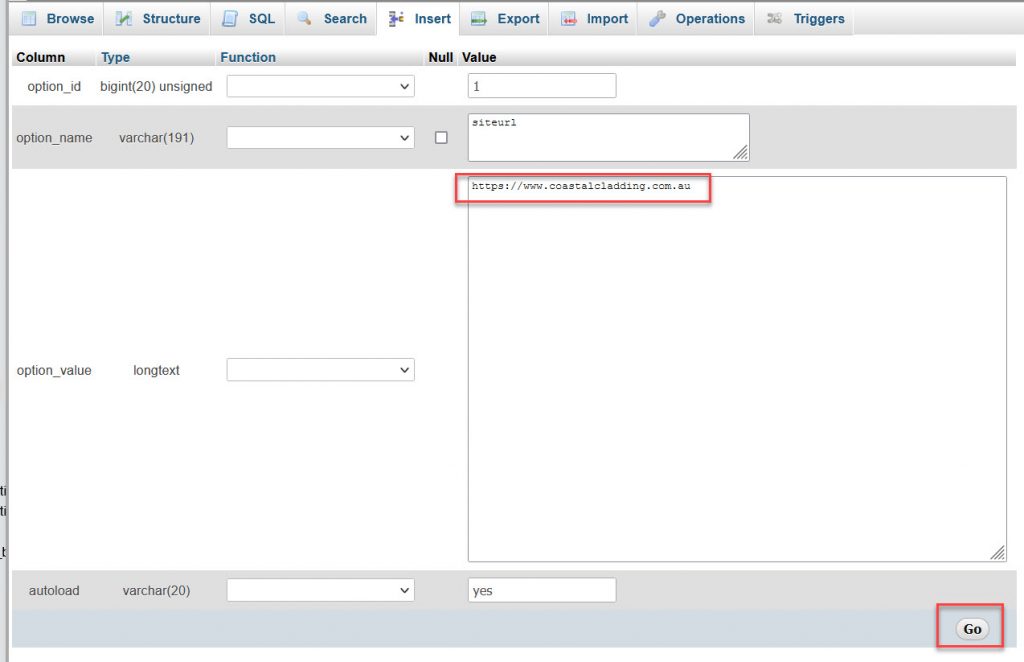
Note: be sure to make sure you are using the HTTP type, either HTTP:// for a website without an SSL certificate and HTTPS:// for a website with an SSL certificate.
Once updated, click the “Go” button in the bottom right.
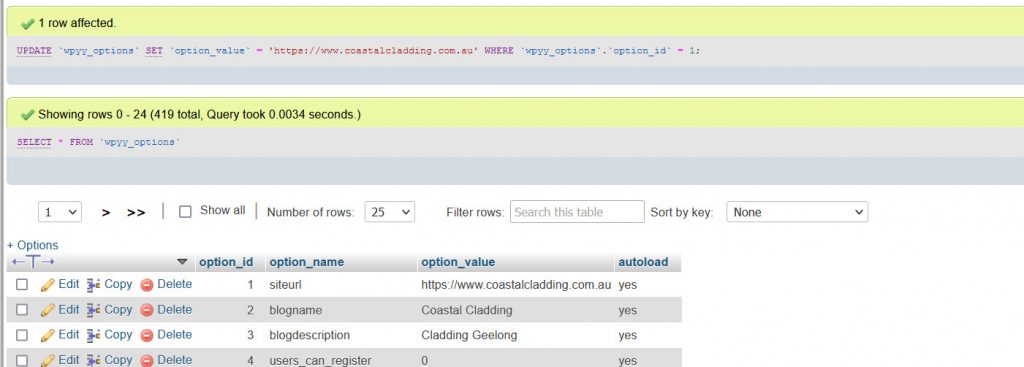
Once updated, phpMyAdmin will navigate back to the options table view and a green confirmation will appear “1 row affected”
Now that we have updated the “siteurl” entry, we also need to update the “home” entry.
Sometimes the home row/entry will display under the “siteurl” or on the same page as the “siteurl” entry. and sometimes it’s on another page.
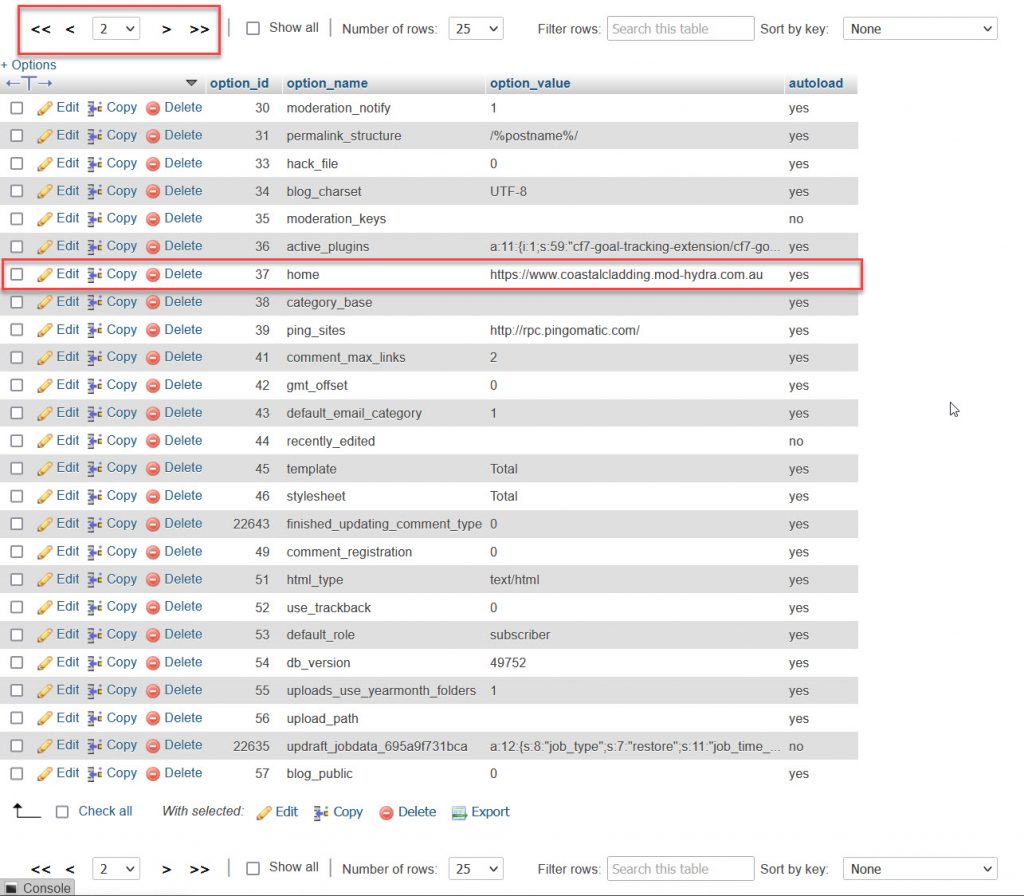
Use the database row navigation on the top left and change the page until you find the home row/entry.
Just like we did with the “siteurl”, update the “home” row entry to match the new domain name.
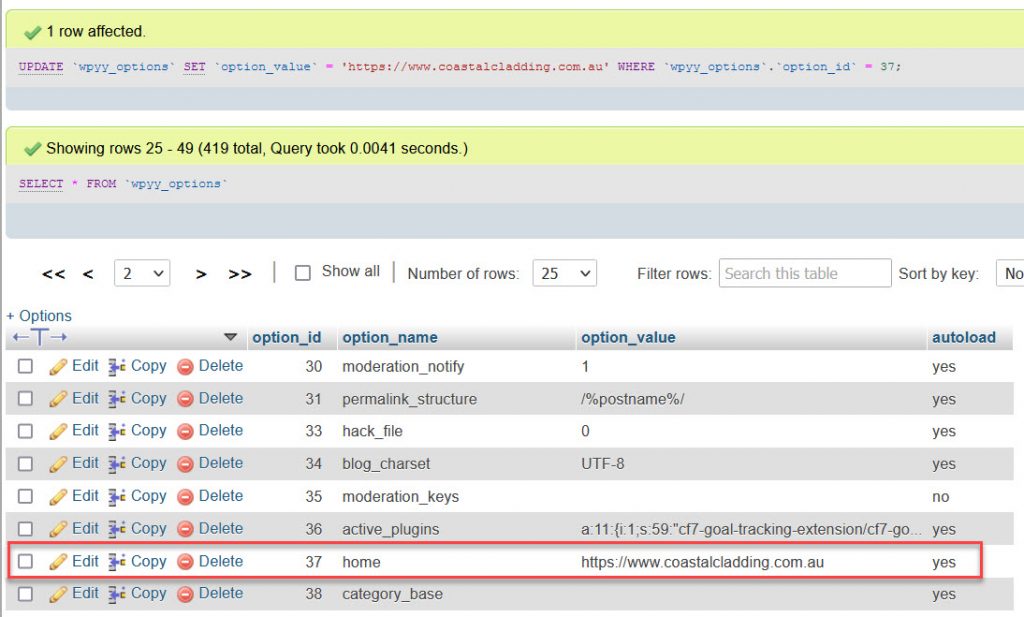
Next, in an incognito/private window test the new website URL and check the website loads.
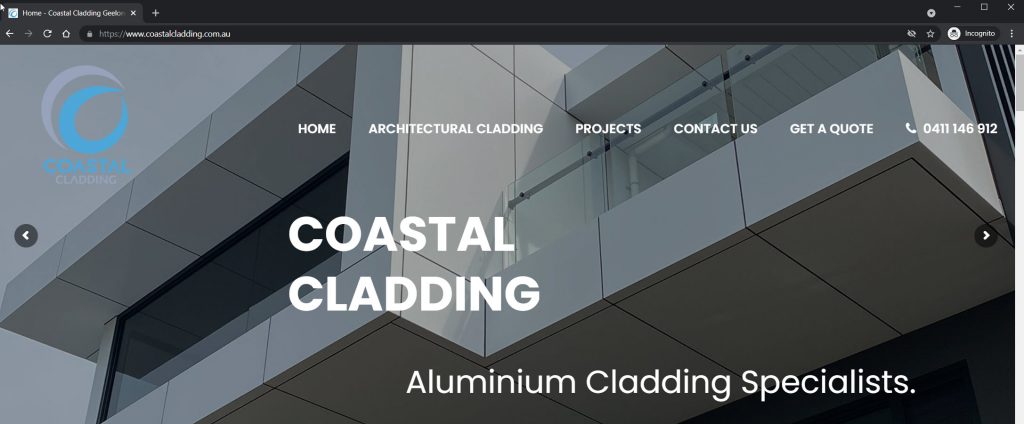
Our website now loads. Check that the website links from your menu work. Sometimes when changing the site URL permalinks can break and need to be reset.
10. Updating URL’s in your website content and resetting WordPress permalinks.
There are two types of updates we need to make to URLs. The first is resetting permalinks if they are broken and the second is updating the old/dev website links to match the new/final website URL.
Resetting WordPress Permalinks:
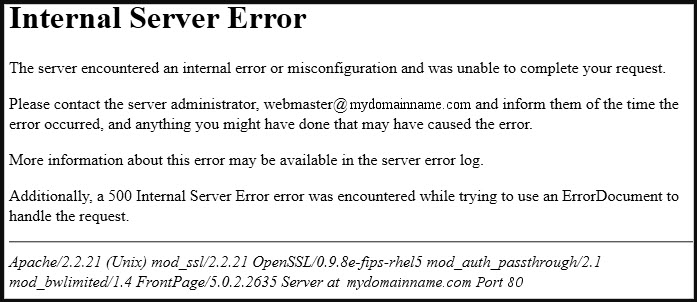
When WordPress permalinks break after migration the menu is always the first sign. A simple link that generated which links to say a contact page may throw a 404 or internal server error.
Resetting WordPress’s permalinks is very easy and straightforward. Login to the backend of WordPress on the newly launched website.
Your existing username and password will be the same as that data is stored in WordPresses database, just like the home and siteurl entries. Ensure when opening wp-admin that the login page is for your new/final website URL and not the old/dev one!
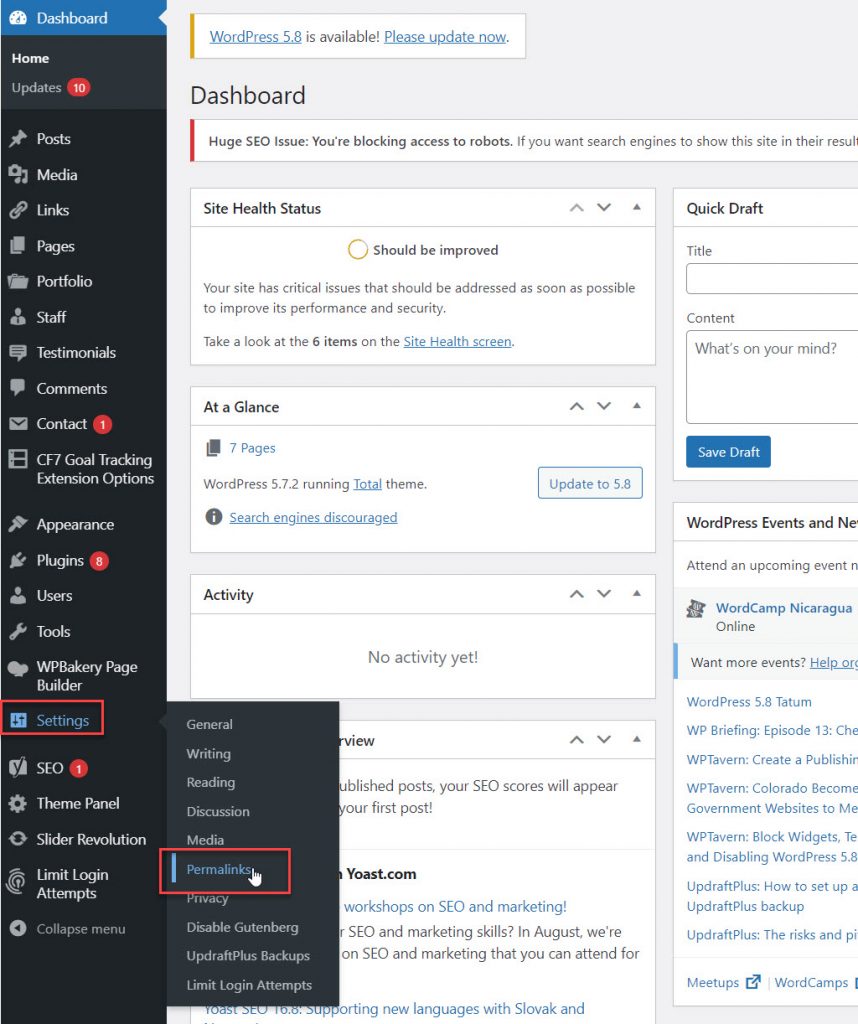
From the WordPress dashboard, navigate to Settings then Permalinks.
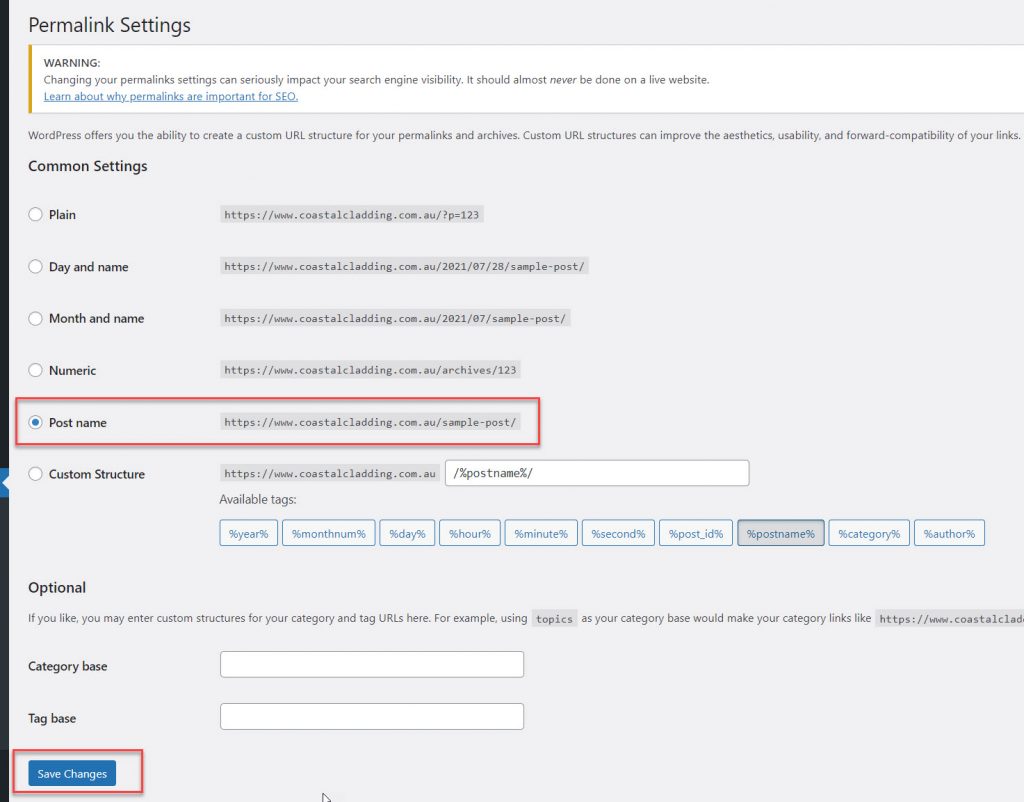
The previous permalink structure from your old/dev website should be selected by default. We use “Post Name” for our websites to create search engine friendly URLS, that and URLs like /?p=453/ just look crap.
All you need to do to reset the permalink cache is “Click Changes”.
Now navigate back to the front end and check that your menu links work.
Updating Internal URL’s to match the new/final domain name:
One of the last steps to Launch a WordPress Site is updating internal URLs. Even though we have fixed the permalinks, there might be buttons, custom menu items, internal links or even images that are still loading from the old website.
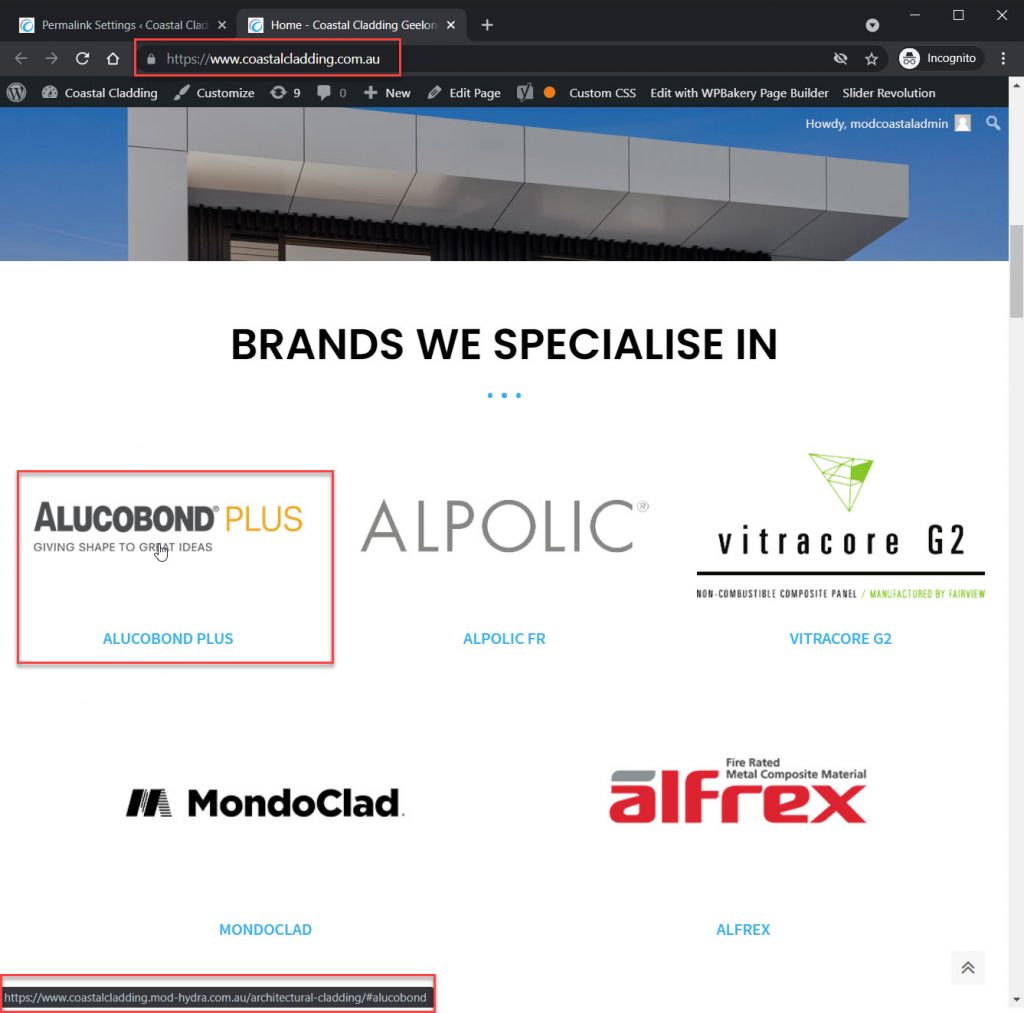
As per the above screenshot, even though the website is loading under the correct/new domain name, and internal image link is pointing to the old dev version.
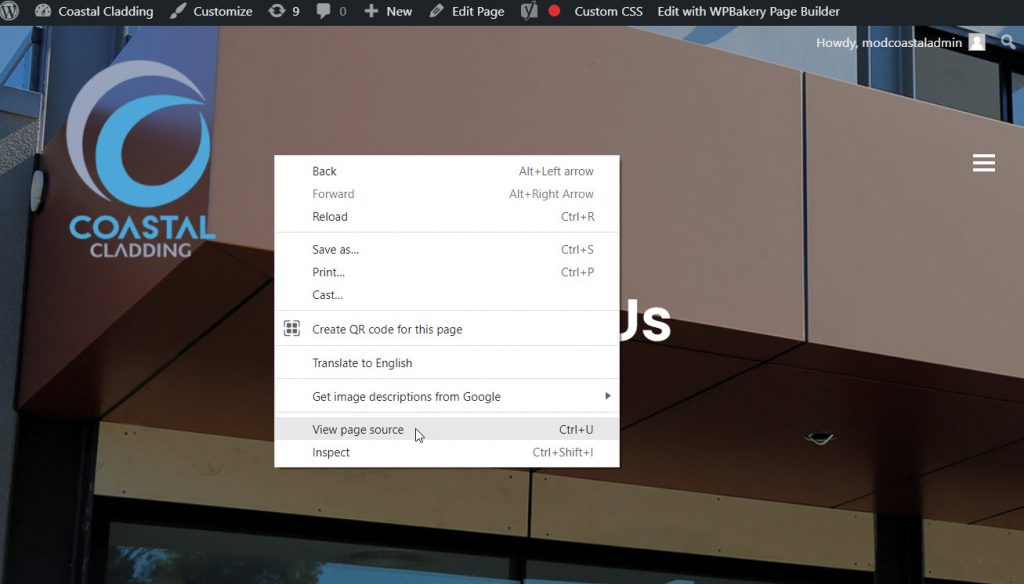
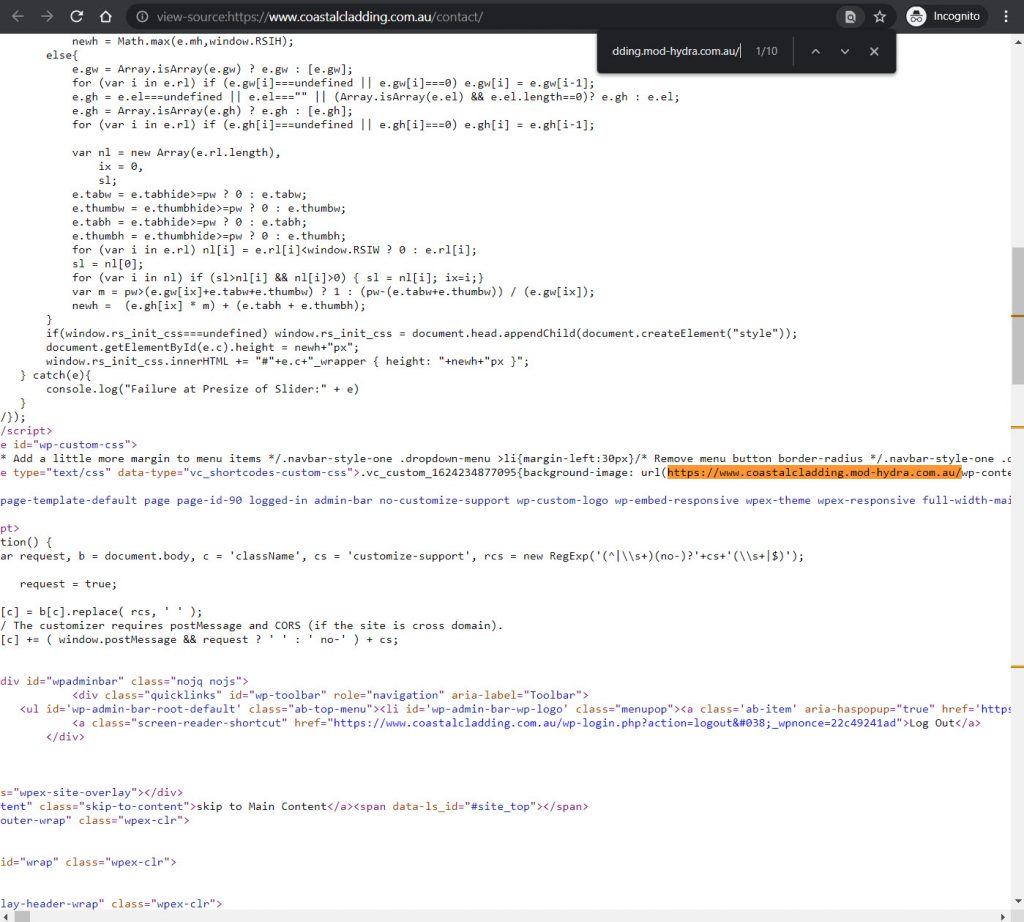
Another way to check how many URLs are from the old/dev website, you can also right-click in Google Chrome/Mozilla Firefox and select “View Page Source”
On the page source tab, hit Ctrl + F to open find, and enter the old/dev website URL.
In a previous post I wrote on moving a WordPress website from a sub-domain I covered three different methods of updating internal links, the easiest method is to use a plugin called “Go Live Update URLS“ which we will be using in this guide.
Backing up the website before updating the internal links
Before we update the internal links it’s a good idea to take a backup of the WordPress files and SQL database. If something goes wrong with updating the links, all the URL data in the WordPress database can become corrupted and break the site.
Something as small as an incorrect character or blank space can cause his to happen, human error is always possible so a backup is worth the time it takes. When it comes to the launch of a WordPress site, there are no such thing as too many backups.
As this website is the only one on the new website server/hosting account, I am going to download a copy of the home directory and SQL database using cPanel’s backup function.
Navigate back to the cPanel home screen then Backup.
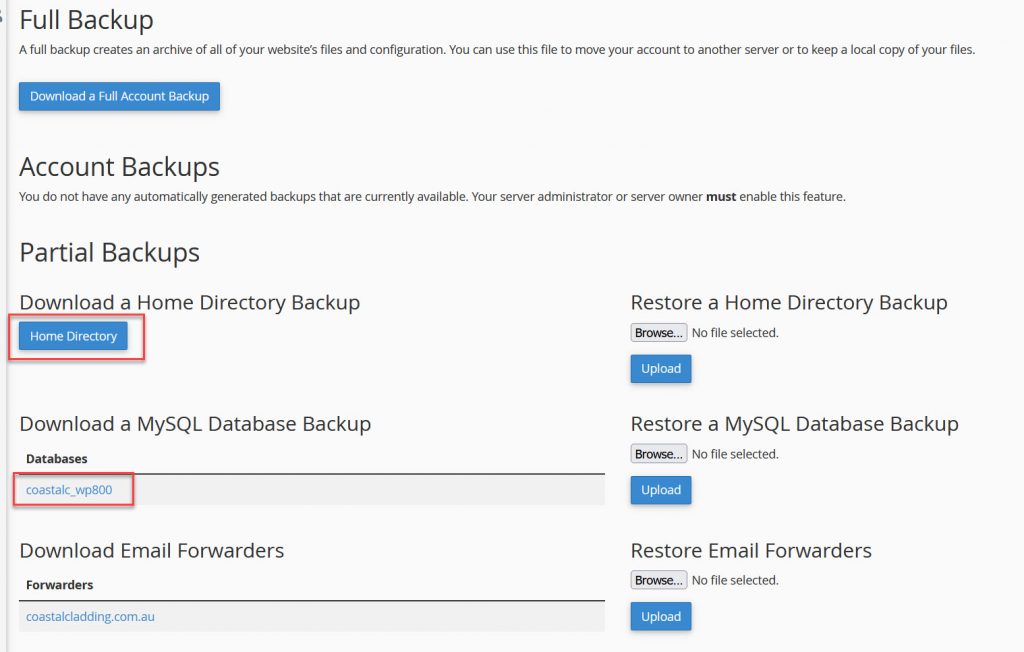
Click on the Home Directory button and the name of the database to download a local copy. When updating the internal links it’s really only the database that can be affected if something goes wrong. But as I have not taken a backup since editing the wp-config files, it’s a good time to take a progress backup of both.

When I store backups during a WordPress website launch, I name my folders by the date and the stage of the launch. This is a clean way of storing backups in case you make an error and needed to restore public_html files or the database. It will also save having to start the whole process from scratch.
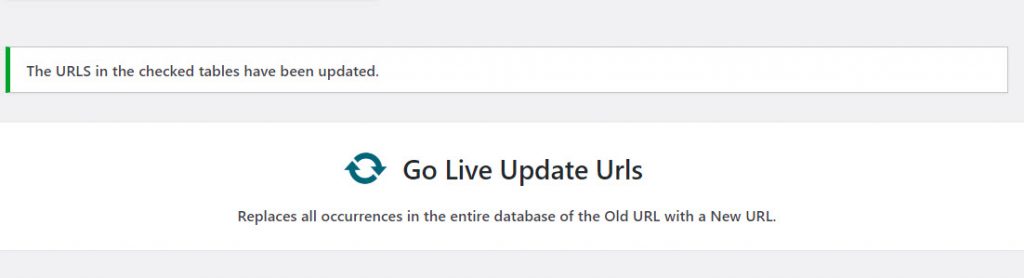
Back to Go Live Update URLS
What the plugin does is essentially scan the WordPress database and updates any values matching the old URL and updates them to the new URL, making the launch process much easier compared to manual updates.
From the WordPress Dashboard, Navigate to Plugins and then Add New. In the search box on the top right, type in “Go Live Update URLS”
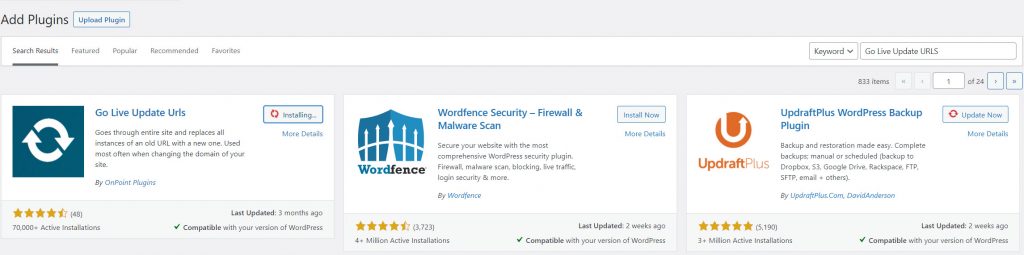
Install and Activate the plugin.
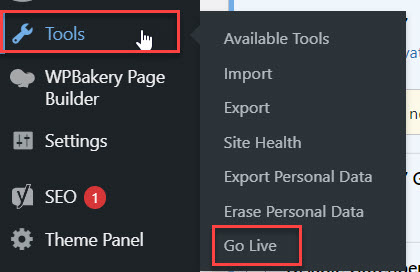
Once activated, from the WordPress admin menu, navigate to Tools and Go Live.
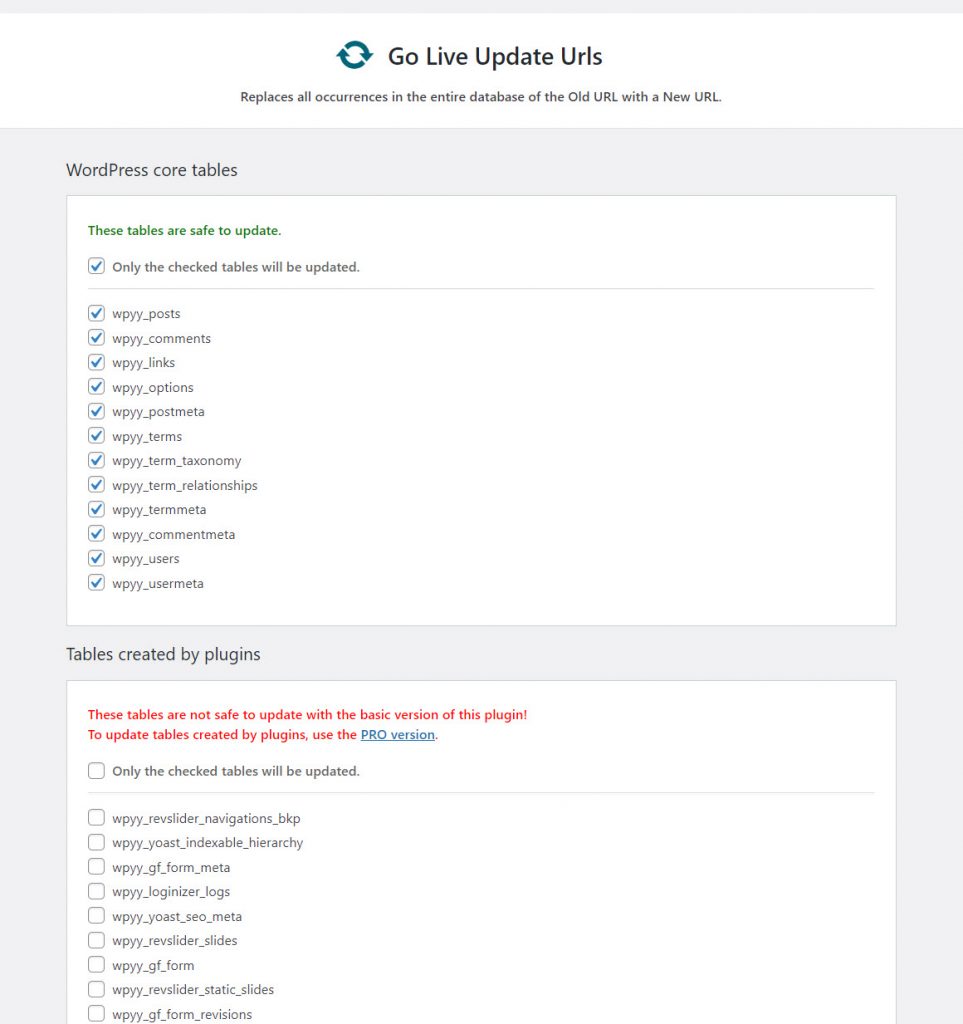
When you open Go Live, you will see two sections. 1. WordPress core tables and 2. Tables created by plugins. I generally update URLs with this plugin in two stages.
I update the WordPress core tables first, then plugin tables second. This way if an update goes wrong I can determine if it was from a Core Table or Plugin Table in the database.
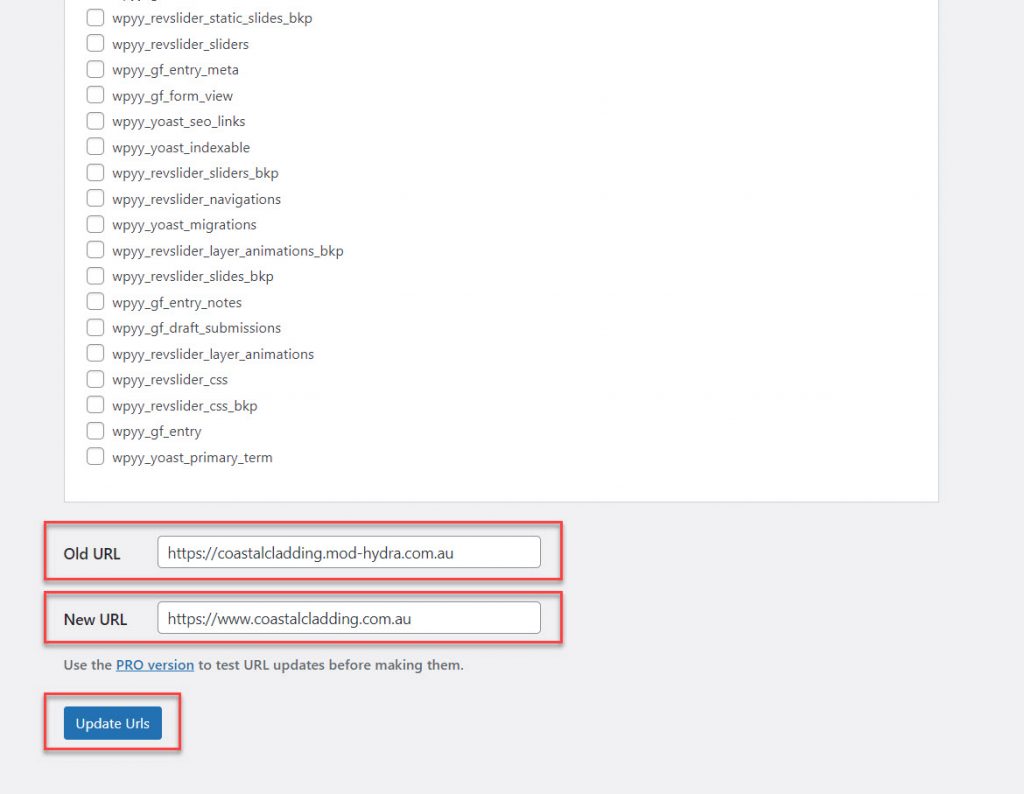
Go Live’s interface is pretty straightforward, you enting in the old website URL and the new website URL. Before moving forward, it’s important to read the below.
Important Note about forward slash “/”
When entering the new URL do not include the trailing forward slash “/”. I used to do this and discovered it was doubling up the slashes, for example, instead of URLs presenting as:
https://www.coastalcladding.com.au/contact/
Links were being formatted as:
https://www.coastalcladding.com.au//contact/
The pages were still loading, but this was either the browser or web service correcting the URL. The page HTML sourcecode still showed the double slashes “//”. Which is bad practice and I have a suspicion this can impact how pages and links are seen in Google.
When ready, hit the updated URLs button.
When completed, a simple notification will appear.
You might want to back up the database in between different updates, for example, after the core table update but before the plugin table updates. Entirely up to you.
Updating different version of the old/dev URL:
Sometimes you may need to run Go Live updates URL’s twice, once for the old/dev URL with the www and then a section-time without.
Always start with the secured top-level version first.
https://www.mydomain.com
Then move onto:
http://www.mydomain.com
Then secured without the www prefix:
https://mydomain.com
Then the non-secured version without the www prefix:
http://mydomain.com
99% of the time I only need to update the exact match of the old/dev URL.
URLs For Slider Revolution:
If you are using Slider Revolution and find your image URLs are not updating, I have created a specific guide on How to Update Slider Revolution URL’s after changing domain name
Launch a WordPress Site Completed
Congrats, you have learnt the complete process to Launch a WordPress Site from a sub-domain to a new hosting service. This can seem like a large amount of work, overtime you can get the process down pretty quickly.
On average it takes me around 30min to one hour to complete the above launch and if it’s done late at night or early hours there is minimal impact to the client.
There are also other methods of completing this launch, for example, you might upload the website and complete all the preparation prior to updating Name Servers, or you might even migrate an old website to the new hosting service, then load the new website over that, once propagation has completed.
I hope you enjoyed the guide and drop a comment below if you have any questions.